Stop Throwing Them Away: 10 Old Jeans Reuse DIY Ideas That Are Actually Worth Your Time
If you are sitting with a pile of jeans you no longer wear and genuinely cannot figure out what to do with them, this list was made for you.
In this post, I am sharing 10 creative old jeans reuse DIY ideas that are practical, doable at home, and actually produce something you will want to keep.
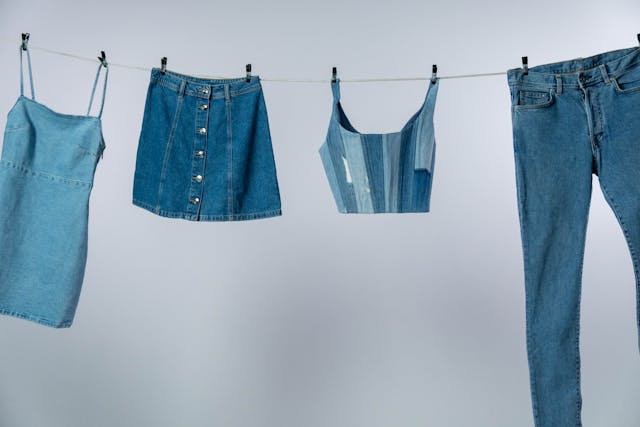
I used to love jeans in every color and silhouette. Dark rinse, light wash, wide leg, straight cut, the whole spectrum. If it was denim, I probably owned it at some point.
But somewhere along the way, my taste shifted. The styles I once loved started feeling wrong, not for any dramatic reason, just the slow, quiet way we change. The jeans were still perfectly good. I just was not wearing them anymore.
Donating pants felt like a line I could not cross for hygiene reasons. Throwing them away felt wasteful. So they sat. Folded. Taking up space. Until I decided to do something actually useful with them.
What I found out is that denim is one of the most forgiving and versatile fabrics to work with. It does not fray immediately, it holds its shape, and it already comes pre-loved, which means any imperfection in your work just adds to the character. You genuinely cannot mess it up.
Why Denim Is the Perfect DIY Material
Most fabrics punish beginners. They fray the second you look at them wrong, they stretch in the wrong direction, they need precise cuts. Denim does almost none of that.
The weave is tight and sturdy. The edges hold for long enough to work with. The seams, pockets, belt loops, and rivets are already finished, which means half your work is already done by the original manufacturer. You are just repurposing what is already there.
Denim is also visually interesting on its own. The texture, the fading, the subtle variations in color across a single pair of jeans. Every project you make from old jeans has a built-in personality that you could never replicate by buying new fabric from a store.
What You Will Need Before You Start
- A pair of sharp fabric scissors or a rotary cutter
- A ruler or measuring tape
- Tailor’s chalk or a washable marker
- A seam ripper for projects involving pockets
- A basic needle and thread, or a sewing machine if you have one
- A hot glue gun for the no-sew options
- Iron and ironing board for clean folds and seams
That is genuinely it for most of these projects. You do not need specialist equipment or advanced skills. The difficulty level for each idea is noted so you can pick what fits your confidence and available time.
A Thought Before We Start
I am a minimalist at heart. I genuinely believe in owning fewer, better things, and that includes what we make as much as what we buy. So when I say these projects are worth your time, I mean it in a specific way: they produce objects you will actually use, not just craft for the sake of crafting.
A tote bag that you grab every time you go to the market. A planter that lives on your windowsill for three years. A small pouch that holds your phone charger so you stop losing it. These are not decorative weekend projects. They are functional things you will reach for again and again.
That is the bar I set for every idea here. If it was not something I could genuinely see myself or a friend using, it did not make the list.
And if you are in the middle of a bigger closet edit and wondering how to make smarter decisions about what to keep and what to let go, the 30-Day Declutter Challenge for Busy Moms is a structured guide that helps you move through the whole process without getting stuck.
Quick Win Box
- Pick up one pair of jeans you know you will never wear again.
- Cut both legs off at the thigh right now. You now have two long rectangles of denim fabric ready to use for at least four of the projects on this list.
- That one cut is the hardest part. Everything else is just deciding what to make.
Resources Worth Bookmarking
Before we get into the list, a few genuinely useful places to look if you want step-by-step tutorials alongside these ideas. Scratch and Stitch’s denim upcycling guide has detailed instructions on how to use every part of a jean, including the seams, pockets, hardware, and belt loops, not just the flat fabric panels.
For the no-sew crowd, Thriving Sustainably’s upcycle jeans guide breaks down which projects actually require a needle and which ones you can complete with scissors and a hot glue gun. More useful than it sounds.
And if you want to go deeper on the sustainability angle, Upcycle My Stuff covers 25 different project types with links to tutorials for each. Good for when you finish this list and want to keep going.
10 Old Jeans Reuse DIY Ideas Worth Actually Doing

1. Sew Yourself a Tote Bag You Will Actually Grab Every Day
Cut both legs off at the thigh. Cut two equal rectangles from the panels, one for the front and one for the back. Place them right sides together, sew along three edges, flip it right side out. That is the bag body done.
For handles, cut two long strips from the leftover denim, fold each one lengthwise, topstitch along the edge, and sew them firmly to the inside of the top opening. If you want something sturdier, use the waistband instead. The original seams at the bottom corners add reinforcement exactly where bags tend to split.
Denim tote bags wear in over time, not out. The more you use it, the better it looks. If you want a lining, cut a matching piece from an old cotton shirt and sew it inside before finishing the top edge. If you do not want a lining, leave it raw. Both versions work fine.
Difficulty: Beginner. Sewing machine recommended but not required. Time: 60 to 90 minutes.
2. Plant Something in a Jean Leg

Cut one leg off. Decide how tall you want the planter. Fold the bottom edge under by about two centimeters and hot glue it flat. Drop a small plastic pot inside, fill it with soil, and plant something. Twenty minutes from cutting to watering.
Denim holds its shape well once there is a pot inside, and it looks much better on a windowsill than a plastic tray or a plain terracotta. A row of three different-height planters from the same pair of jeans looks like a matched set without any effort, since the fabric already matches.
Basil, mint, and rosemary work well, herbs you will actually use. A small trailing succulent works too if you want something lower maintenance. If your kids want to help, hand this one to them: no sewing, three steps, and they get to water it every day.
Difficulty: Complete beginner. No-sew. Time: 20 minutes per planter.
3. Detach the Back Pockets and Turn Them Into Pouches
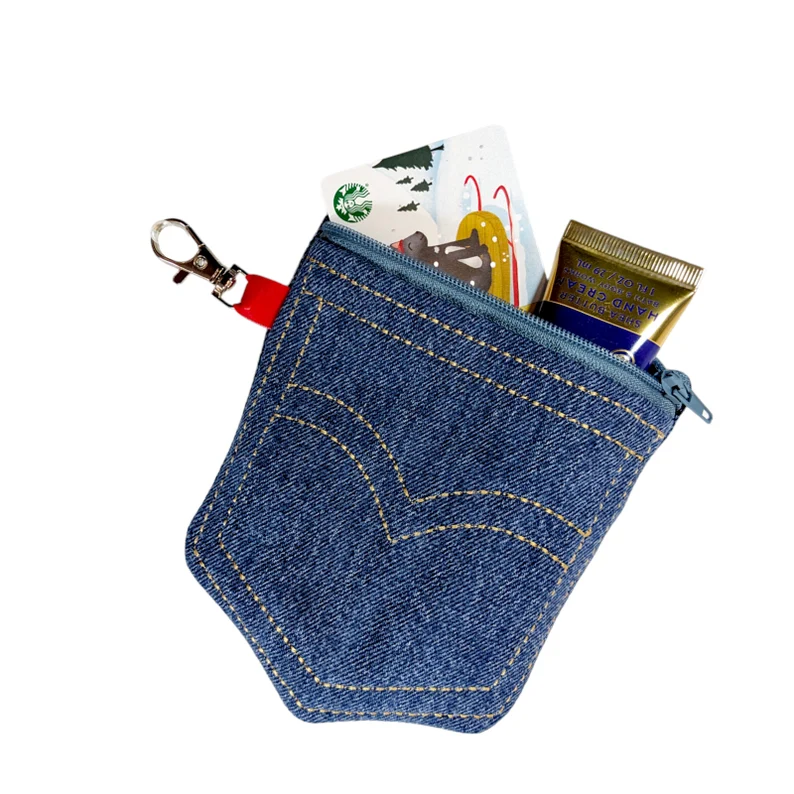
Take a seam ripper and slide it under the stitching around one back pocket. Work slowly around all four edges. The pocket comes off in one piece with the decorative stitching intact. It is already shaped like a pouch. You just need to close the top.
Cut a matching rectangle from the jean leg for the back panel. Sew it to the pocket on three sides, flip it right side out, and close the top with a zipper or a large snap. You end up with a small pouch that fits a phone, a charging cable, a few receipts, or a child’s hair ties. It looks like something from a slow-fashion stall, not a rainy Friday afternoon project.
I made three from one pair of jeans in an afternoon. One lives in my bag. One sits on the kitchen counter. My daughter took the third one and I have not seen it since. These get used more than anything else I made from denim, which is the only real measure of whether a project was worth doing.
Difficulty: Beginner to intermediate depending on zipper. Time: 30 to 45 minutes each.
4. Roll and Coil a Storage Basket
Cut the jeans into long strips, about two centimeters wide. Start from the bottom of each leg and cut in a spiral to get the longest possible continuous strip. Roll the first strip into a tight coil for the base, stitching or gluing each round to the previous one as you build outward. When the base is the size you need, start coiling upward to form the sides.
The finished basket is heavier than it looks and holds its shape well. Good for magazines, yarn, phone chargers, or the random small objects that otherwise end up spread across every flat surface. On a shelf it looks deliberate. On the floor next to a sofa it looks like you have an eye for texture.
If the coiling feels fiddly, cut the denim into squares instead, stack several layers with fabric stiffener between them, and build a rectangular bin. Less work, slightly less interesting result, but still something you would not feel the need to hide before guests arrive.
Difficulty: Intermediate. Time: 2 to 3 hours depending on size.
5. Cut Them Into Shorts

Put the jeans on. Mark with chalk where you want the hem. Take them off and cut about two centimeters below that line. That extra two centimeters is the difference between a hem that looks right and one that looks like you changed your mind halfway.
For a clean finish: fold the raw edge up once, press with an iron, and sew or use iron-on hem tape. Takes fifteen minutes. For a raw finish: cut and leave it. The denim frays slightly and then stops, which looks intentional on lighter washes and works well on darker ones too.
This is the project for jeans with a fit that no longer works. Wrong rise, outdated silhouette, too long in the leg. None of that matters once they are shorts. If you have been avoiding this because cutting feels final: yes, it is. That is also why it is satisfying once it is done.
Difficulty: Complete beginner. Time: 15 to 30 minutes.
6. Make a Set of Denim Coasters
Cut denim into squares, roughly ten by ten centimeters. Stack two squares together, wrong sides facing each other, and sew around all four edges. That is a coaster. It will not slide on a table, it will not stain easily, and it will not wear out after a few months like cork does.
For placemats, cut larger rectangles, about the size of a sheet of paper, and use the same method. The denim absorbs condensation and does not slip under plates. Using different washes across a set looks varied rather than mismatched and costs no extra effort.
These are also the project to make when you need a gift in two hours. A set of four or six coasters in mixed denim washes, wrapped in a piece of fabric tied with string, looks like something you thought about. Which you did, briefly, while cutting squares.
Difficulty: Complete beginner. Time: 20 minutes for a set of four coasters.
7. Hang a Denim Pocket Organizer on the Wall and Stop Losing Everything
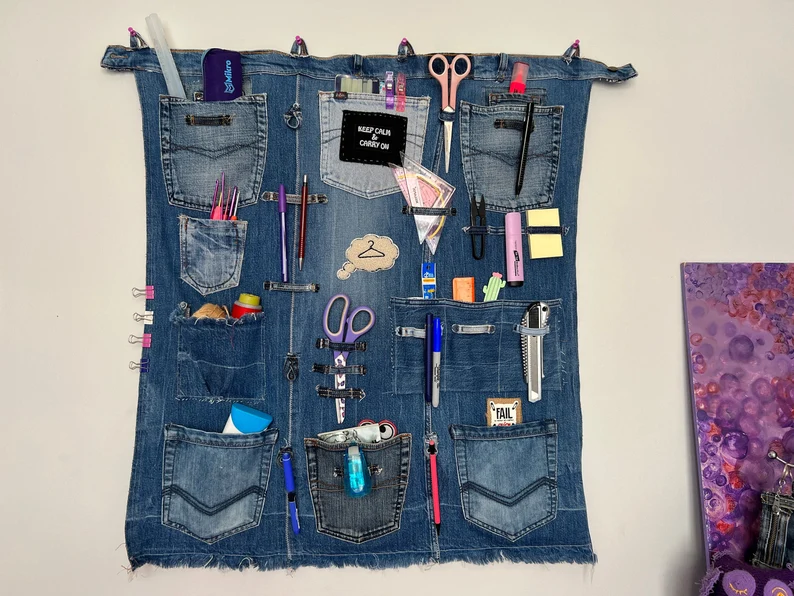
Cut a large rectangle from the widest part of the jean legs or from the back panel. This is your base. Lay the remaining original pockets across the surface wherever they make spatial sense and sew them down along the sides and bottom edges only, leaving the top open so things can actually go in.
Attach the whole thing to a wooden dowel or a curtain rod by folding the top edge over it and sewing a channel. Hang it on a wall in the hallway, the home office, the children’s room, or beside the kitchen door. Mail goes in one pocket. Scissors go in another. Charging cables stop ending up on the floor. Your child’s crayons have a place that is not the bottom of the sofa.
The denim holds its shape without a frame, which means this hangs flat against the wall without needing any additional structure. The existing pocket stitching gives it enough visual interest that it does not need decoration, though you can add labels with a fabric marker if the people in your household need more direction about where things go. This is one of those projects where the five minutes of hanging it up feel disproportionately satisfying compared to the hour it took to make.
Difficulty: Beginner. Time: 45 to 60 minutes.
8. Stitch a Cushion Cover
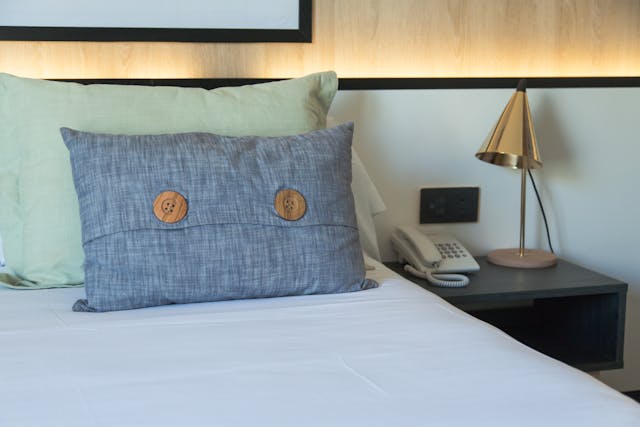
Cut two denim rectangles the size of your cushion insert, plus two centimeters on each side for seam allowance. Sew along three sides, flip right side out, insert the cushion, and close the open edge with a few hand stitches or a topstitched fold. Done.
Denim sits quietly in a room. It does not clash with other colors, it does not draw attention to itself, and it wears well over time instead of pilling or fading in unflattering ways. Denim blue is a neutral in the same way linen and grey are neutrals. It goes with everything because it has always gone with everything.
Use the original hem as one edge of the cover. Use the waistband as a trim along the opening. These are small decisions but they make the finished cover look more deliberate. No one needs to know it took you forty-five minutes. It looks like it took much longer.
Difficulty: Beginner with basic sewing. Time: 45 to 60 minutes per cover.
9. Wear a Denim Apron in the Kitchen

Lay the jeans flat and cut both legs off at the hip. Open one side seam along the full length so you have a flat panel. This panel is roughly the right shape for an apron already. Trim the top into a bib shape if you want upper coverage, or leave it as a waist apron if you prefer something simpler.
Cut two strips from the leg fabric for ties, fold each in half lengthwise, press with an iron, topstitch, and attach them at the waist. Sew one of the original back pockets onto the front panel. Now there is somewhere for a pen, a phone, or the kitchen timer you keep losing between the counter and the utensil drawer.
Denim does not show kitchen stains the way light-colored aprons do. It looks better the more it is used. And because you wore these jeans, the fabric has a familiarity that a new apron from a shop does not have. For more on making what you own feel intentional rather than just functional, the minimalist fashion guide covers exactly this way of thinking.
Difficulty: Beginner to intermediate. Time: 60 to 90 minutes.
10. Braid and Coil a Denim Rug
Cut all your jeans into strips about two centimeters wide, working in spirals around each leg to keep the strips continuous. Braid three strips together into a flat braid. Coil the braid into a circle or oval and stitch each round to the previous one as you go. Keep going until the rug is the size you need.
The finished rug handles daily foot traffic, washes in a machine on a gentle cycle, and adds real texture to a bathroom floor or the side of a bed. Uneven strips and slightly irregular stitching disappear into the braid texture. The imperfections read as handmade character, not mistakes.
This takes the most time of any project here. It is the one for a long afternoon when you want to work with your hands and listen to something. More than one pair of jeans makes a bigger rug. Mixing washes gives natural variation across the surface. The same approach to using what you already have, applied to home storage, is covered in Stop Buying Storage Bins You Don’t Need.
Difficulty: Intermediate to advanced. Time: 4 to 6 hours for a bath rug size.
Before You Start: Quick Checklist
Save this before your first project.
- Collect all jeans you have not worn in 12 months or more
- Wash and dry them before cutting
- Get scissors, chalk, and a seam ripper together first
- Decide what you are making before you cut anything
- Start with a no-sew project if you are new to working with denim
- Cut both legs off first to free up usable fabric
- Keep all the small offcuts: strips work for coasters and pouch handles
- Save the hardware: buttons, rivets, zippers all have uses
- Block out at least two hours for a first project
- Take a photo when you are done. You will want it.
Pin this so you have it next time you open the closet and find something you know you will never wear again.
Do This Today
- Find one pair. One pair you have not touched in a year. Put it somewhere you will see it, not back in the closet.
- Pick one project. The one that matches your skill level and the time you actually have this week.
- Cut the legs off. It feels irreversible because it is. That is also why it works.
Right Before You Cut
- Are the jeans clean and dry
- Do you have fabric scissors, not kitchen ones
- Have you marked your cut lines with chalk
- Do you know which project you are making
- Have you set aside an hour without interruption
Q&A
1. Do I need a sewing machine?
No. The planters, coasters, and basic pouch all work with a needle and thread or a hot glue gun. A sewing machine is faster and makes cleaner seams, but it is not required for most of these.
2. My jeans are worn out in places. Can I still use them?
Yes. Cut from the intact sections and discard the damaged parts. Most jeans have two or three usable panels even when the knees or seat are gone.
3. Can I use stretch denim?
You can, but stretch fabric moves while you work with it, which makes cutting and sewing less precise. For bags and anything structural, regular denim is significantly easier.
4. What do I do with the waistband?
Keep it. It is a fully finished strip of reinforced denim with the button and buttonhole already in place. Use it as a bag handle, a pouch closure, or a hanging loop for the wall organizer.
5. Is this actually sustainable?
Yes. Every pair that becomes something useful is one that does not go to a landfill. The fashion industry discards enormous amounts of clothing every year. Using what you already own, even imperfectly, is a meaningful choice.
6. Can kids help?
Several of these work well with kids. The planter, the coasters, and painting or patching the tote bag are all manageable with supervision. Good for a rainy afternoon that produces something real.
7. I have never sewn anything. Where do I start?
Start with the planter or the coasters. Both work without a single stitch, using only scissors and a hot glue gun. Once you have finished something, the next step feels less intimidating.
8. How many pairs do I need?
One pair is enough for a tote bag, three or four pouches, and a full set of coasters, with fabric left over. Start with one and see how far it takes you.
9. Can I decorate what I make?
Yes. Fabric paint, embroidery, iron-on patches, and fabric markers all work well on denim. Add decoration after the structure is finished, so you know exactly where it will land.
10. What about tiny scraps that are too small to use?
Save the strips for ties and handles. Very small pieces can patch future projects. Cotton denim can eventually go into a compost bin, though it takes a long time to break down.
Recommended Reading
- 15 Stunning Summer Casual Outfits for Women That Feel As Cool As They Look for building outfits around the denim pieces you decided to keep
- 11 Essential Secrets to Master Japanese Minimalist Fashion on owning fewer, better things and what that looks like in practice
- Stop Buying Storage Bins You Don’t Need because the same thinking that drives denim upcycling applies to home organization
One More Thing
I used to open the closet, see those folded jeans, and feel that low-grade guilt. Too good to bin, too out of style to wear, too attached to let go.
Cutting them up was a decision. On the other side of that decision is a tote bag I use every week, a row of herb planters on my windowsill, and a small pouch my daughter claimed the day I finished it and has not returned since.
They are still here. Just in a different shape.
Question: Which of these projects are you most likely to actually try? And do you have a project that works even better that should be on this list?
You may also like:
-
Here’s How to Create a Truly Relaxing Reading Nook – 12 Cozy Reading Corner Ideas
If you want cozy reading corners that go beyond a pretty chair, this is your guide. Twelve real ideas for a warm reading nook, even in a tiny space on a small budget.
-
21 Cozy Reading Chairs That Turn Any Corner Into a Retreat
A cozy reading chair changes how often you actually pick up a book, and this post rounds up 21 real ideas to help you find yours. From oversized armchairs to thrifted flea market finds, there is a fit here for every space and budget.
-
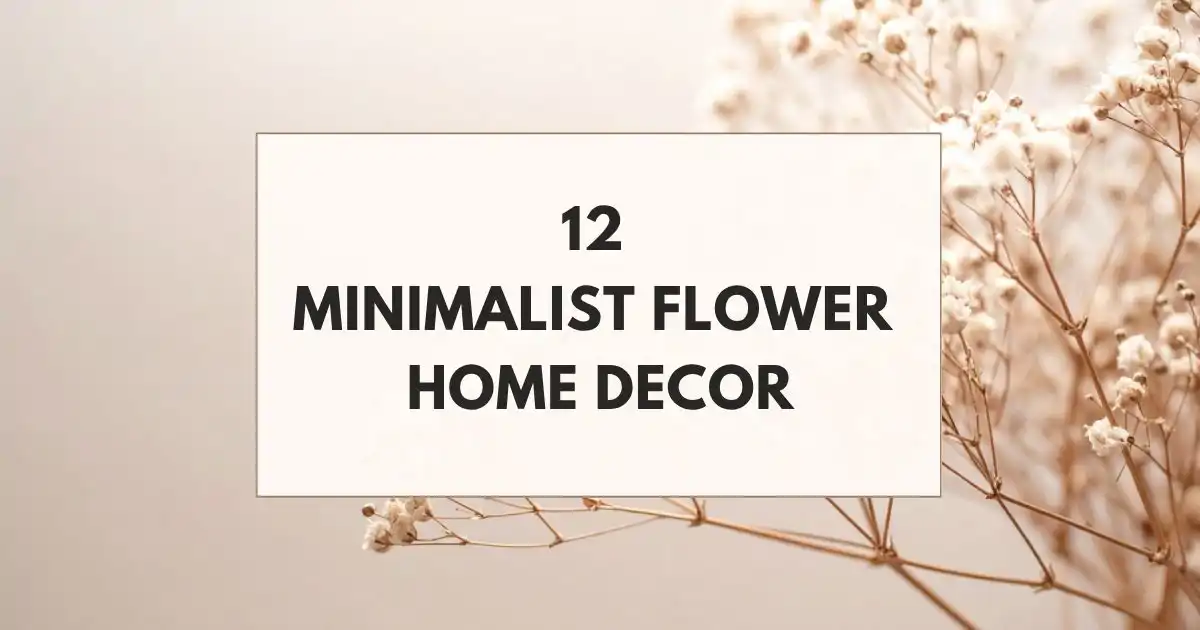
12 Minimalist Flower Home Decor – Easy and Aesthetic Floral Decor That Changes a Room
Minimalist flower home decor is the easiest way to make a room feel calm without buying a single piece of new furniture. Here are simple, real ideas for single stems, dried flowers, and soft neutral vases that fit a busy life and a small budget.