20 DIY Christmas Ornaments You’ll Still Love in 10 Years
Most of us love Christmas. It is the most beautiful and intimate holiday of the year, yet it also entails the most waste.
There are countless ornaments available for purchase; as early as October, I feel overwhelmed by the sheer volume of items flooding the shops and our lives.
Decorating the Christmas tree is usually the main dilemma.
What style should it be? Should we buy new ornaments or make them ourselves? Should we load it up with decorations or keep it minimalist and simple?
It is hard to navigate these choices; it’s a puzzle we face every year, too.
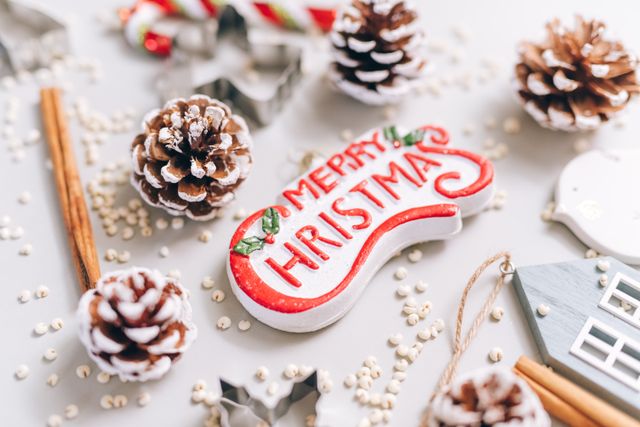
If you want a tree that feels like yours without buying a new box of decorations every year, the answer is to make a few DIY christmas ornaments slowly, from good materials, and keep them.
In this post I show you 20 of them, traditional, European, American and a bit modern, and each one can last for many Christmases.
Disclosure: This post contains affiliate links. If you make a purchase through these links, I may earn a small commission at no extra cost to you. Thank you for supporting my blog!
Why do most homemade ornaments end up in the trash by January? Because a lot of the DIY christmas ornaments we see online are made from foam, glitter and hot glue, and they look tired after one season.
The truth is, I used to make exactly those.
One December I spent three evenings on glitter pine cones with my little son. The glitter was still in our sofa in Spring, and the pine cones went into the bin much earlier.
What stayed? A little salt dough star with his handprint from when he was 3. He’s 16 now, and it still goes on our Christmas tree every year.
So if you only have a minute, here’s the one thing to remember.
Make ornaments from things that age well, like clay, wood, wool, paper, wax and dried fruit, and seal or store them properly.
A good homemade ornament should look better in its fifth year than in its first.
In this article you’ll find
- 20 ornaments you can make at the kitchen table,
- with the exact things you need and how long each one really lasts,
- followed by my honest opinion about DIY christmas decor,
- color pairs,
- the mistakes that make handmade look cheap,
- a short shopping list, and
- a long question and answer part at the end.
What Are DIY Christmas Ornaments?
DIY christmas ornaments are tree decorations you make yourself at home, usually from simple materials like salt dough, clay, paper, wood, felt, beeswax or dried fruit.
Most of the ideas below cost less than 5 dollars for a whole batch, and many of them use things already in your kitchen or your closet.
The way I see it, the best ones aren’t the prettiest on day one, they’re the ones you still want to unpack 10 years later.
20 DIY Christmas Ornaments to Make This Year and Keep for Years
For christmas 2026 I chose ideas that are simple.
They start with the ones made from kitchen and craft basics, then go through Europe and America, and end with a few you can give as gifts.
You don’t have to make all 20. Pick 2 or 3 and do them well.
1. Make white clay stars with pressed greenery
You’ll need:
- white air-dry clay,
- a rolling pin,
- star or round cookie cutters,
- small sprigs of pine,
- fir or rosemary,
- a straw,
- thin cotton string.
How long it lasts: many years, if you keep it dry.
This is the most modern idea on the list, and one of the easiest DIY christmas tree ornaments for adults.
You roll out the clay, press a small sprig of greenery into it, then peel it off. What’s left is a fine print of every needle.
It looks like the handmade christmas ornaments you see in expensive Scandinavian shops.
Nobody believes it took 10 minutes but it’s true.
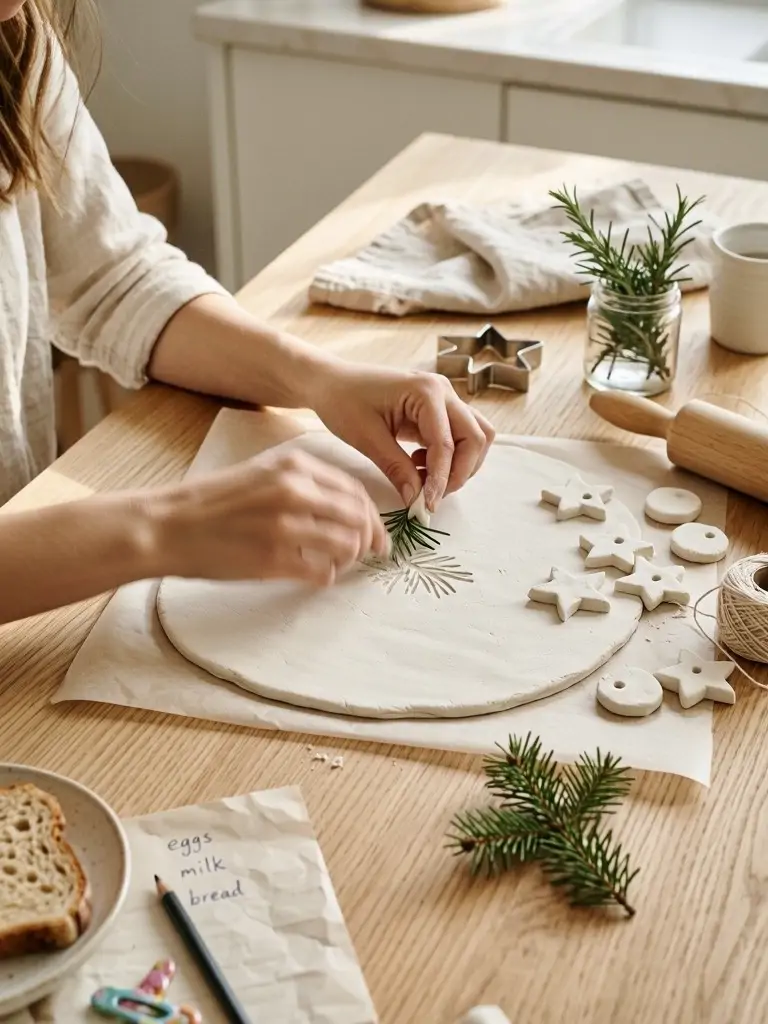
Make them about half a centimeter thick. Thinner ones crack while drying, thicker ones take forever. Poke the hole with a straw before they dry, not after, because I learned the hard way that dry clay doesn’t like drills.
Let them dry for 2 or 3 days and turn them once a day so they stay flat. A pack of white air dry clay is enough for 20 to 30 ornaments.
Pick up one sprig of pine or rosemary on your next walk and try a single star.
2. Bake salt dough ornaments with a handprint
You’ll need:
- 2 cups of flour,
- 1 cup of salt,
- about 3/4 cup of water,
- cookie cutters,
- a straw,
- clear varnish.
How long it lasts: 10 years or more, if it’s sealed.
If you look up homemade christmas ornaments, salt dough is always near the top, and it’s the oldest trick in the book.
My grandmother made them, and so did my mother. Now my kids make them. It’s still the best one for small hands.
Mix the dough, roll it out, cut shapes and bake them at a low temperature, around 250 degrees Fahrenheit, for 2 to 3 hours, until they’re completely hard. Thick pieces need longer.
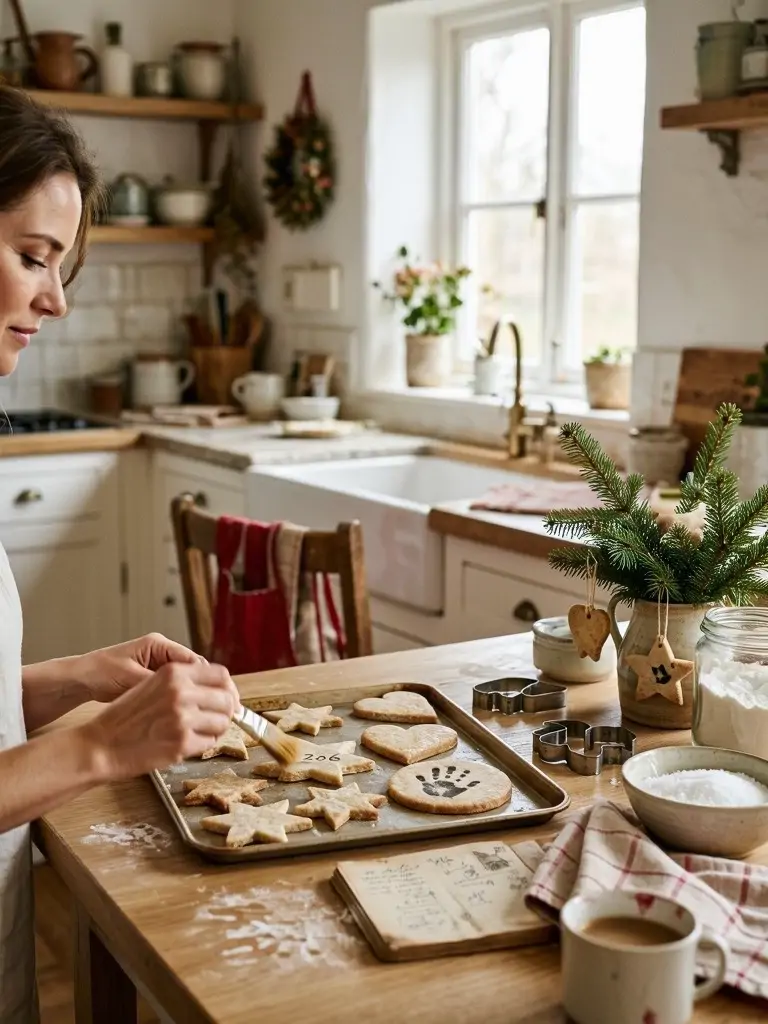
The varnish is the part most people skip, and it’s the part that decides if the ornament lasts.
Without it, salt dough slowly pulls in moisture and goes soft. With 2 thin coats on both sides, it survives for years.
Press a child’s hand into a round piece, or just a thumb, and write the name and the year on the back with a pencil before baking.
I’m not kidding, this is the ornament I would save first if the house was on fire.
Mix one small batch this weekend and make at least one ornament with a handprint or a date on it.
3. Mix cinnamon and applesauce ornaments, the American way
You’ll need:
- 1 cup of ground cinnamon,
- about 3/4 cup of applesauce,
- cookie cutters,
- a straw,
- ribbon.
How long it lasts: several years, the scent fades slowly.
I first saw these in an American craft book, and I didn’t believe they’d work.
Cinnamon and applesauce, nothing else? And it works. The dough is dark brown, and the whole kitchen smells like a bakery.
Roll it out between 2 sheets of baking paper, cut shapes, and either let them air dry for 2 or 3 days or dry them in the oven at the lowest setting for a few hours, turning them now and then.
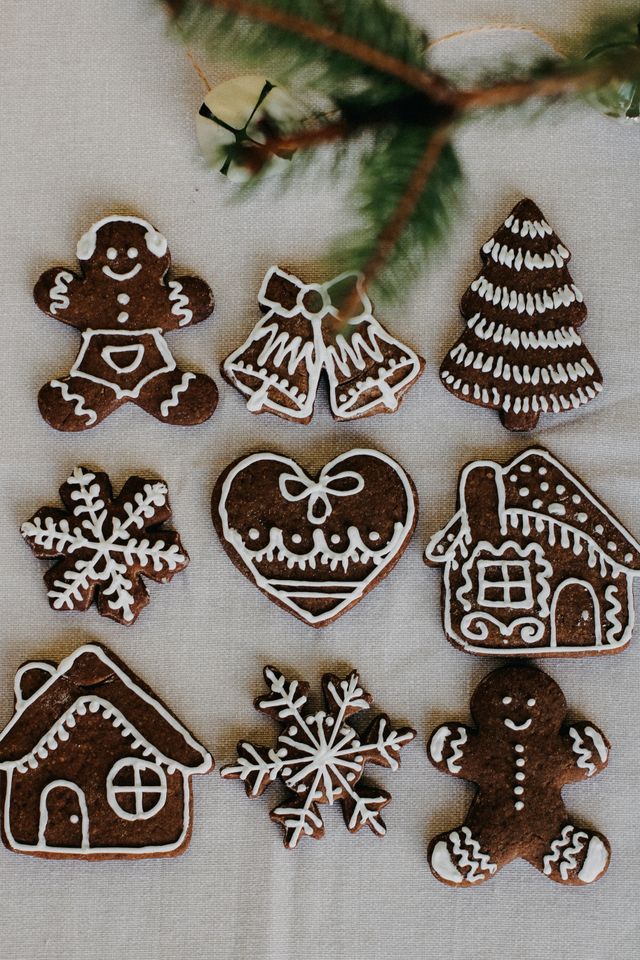
They look lovely on a natural tree, next to wood and white clay.
And they smell like Christmas every time you walk past. When the scent fades after a few years, a drop of cinnamon oil on the back brings it back.
One honest warning: they look like cookies, but they’re not edible.
4. Tie dried orange slices with cinnamon and star anise
You’ll need:
- dried orange slices,
- cinnamon sticks,
- star anise,
- jute twine or red cotton thread.
How long it lasts: 2 or 3 years in a dry place.
Natural christmas ornaments DIY style don’t get simpler than this. One dried orange slice, one cinnamon stick behind it, a star anise on top, all tied together with twine. That’s it.
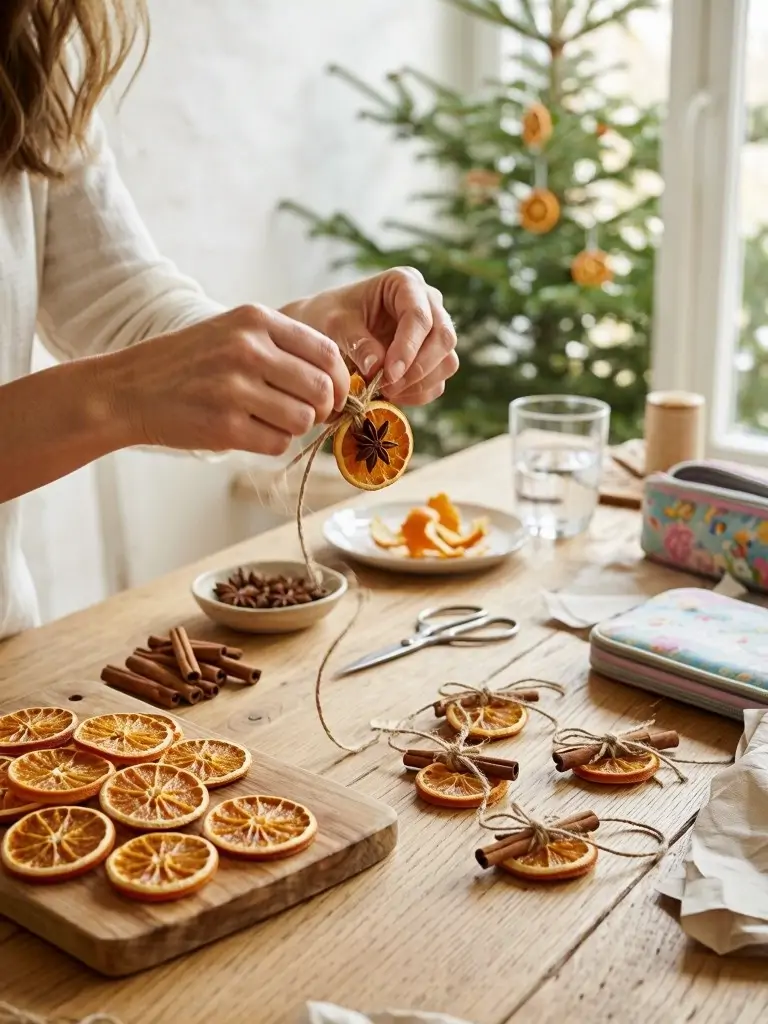
I wrote about drying the oranges in my post on christmas tree ideas 2026, so here I only want to add one thing. Make small bundles instead of hanging single slices. A bundle looks finished, a single slice sometimes looks like it fell off something.
They get darker each year. I actually like them more in their second year, they look like old amber.
If you don’t want to bake, you can buy dried orange slices and just do the tying part.
Buy 4 oranges this week and keep them for the first cold Sunday.
5. Weave Danish paper hearts in 2 colors
You’ll need:
- glossy or colored paper in 2 colors,
- scissors,
- a pencil,
- a simple template,
- a little glue.
How long it lasts: many years, stored flat.
In Denmark, woven paper hearts are part of every Christmas. The oldest known pleated Christmas hearts were made by Hans Christian Andersen in 1860, and they’re still in a museum in Odense.

You cut 2 pieces of paper into a U shape with slits, then weave them into each other. The first one takes 20 minutes and some bad words. The fifth one takes 5 minutes.
Red and white is the classic. Kraft paper and cream look softer and fit a minimalist home perfectly.
You can fill them with a few candies or a folded note and hang them on the tree like a little basket.
My daughter puts her letter for the angel in one. In Hungary, the presents are brought by the Christ Child or the angel, not Santa.
Print a heart template tonight and weave just one, the second one will already be easier.
6. Fold German Froebel stars from 4 paper strips
You’ll need:
- 4 long paper strips per star,
- about 1.5 centimeters wide and
- 45 centimeters long,
- patience (it’s the most important thing, really! 🙂
How long it lasts: many years, if you keep it in a box and don’t squash it.
The Froebel star is a traditional German paper decoration, named after Friedrich Froebel, the man who started kindergarten. It’s made from 4 folded strips, no glue at all.
I’ll be honest, the first time it took me 3 YouTube videos and one very patient evening. But once your hands learn it, it’s almost meditative.
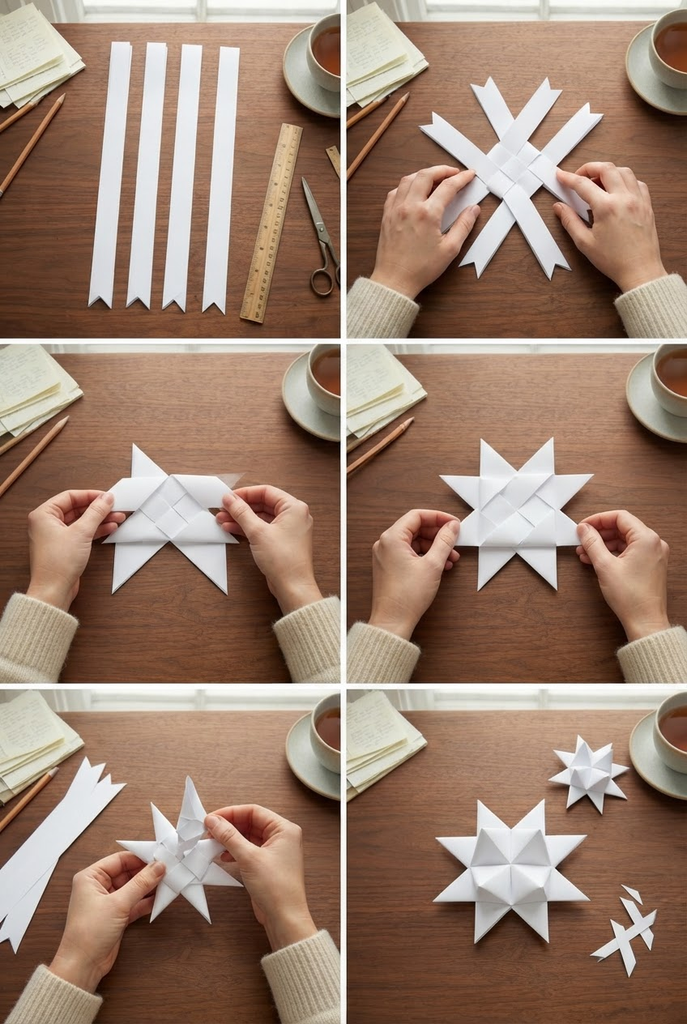
White ones look like snowflakes, gold ones look like real old German ornaments. Some people dip the finished star in melted wax to make it stronger.
This is a great one for grown-ups on a quiet evening, with a cup of tea and no phone nearby.
Cut 4 strips from an old sheet of wrapping paper and try the first folds before bed.
7. Gild walnuts like a Hungarian grandmother
You’ll need:
- whole walnuts in the shell,
- gold acrylic paint or gold leaf,
- small screw eyes or thread, and
- glue.
How long it lasts: decades.
This one is personal. In old Hungarian village homes, the tree was decorated with apples, walnuts wrapped in foil or brushed with gold, and homemade sweets. The Hungarian Open Air Museum wrote about these old tree decorations, if you want to see the pictures.
My grandmother always had gold walnuts on her tree. We still have 2 of them, and they’re older than me.
Paint the walnuts or brush on gold leaf, let them dry, then twist a tiny screw eye into the seam at the top. If that feels fiddly, glue a loop of thread there instead.
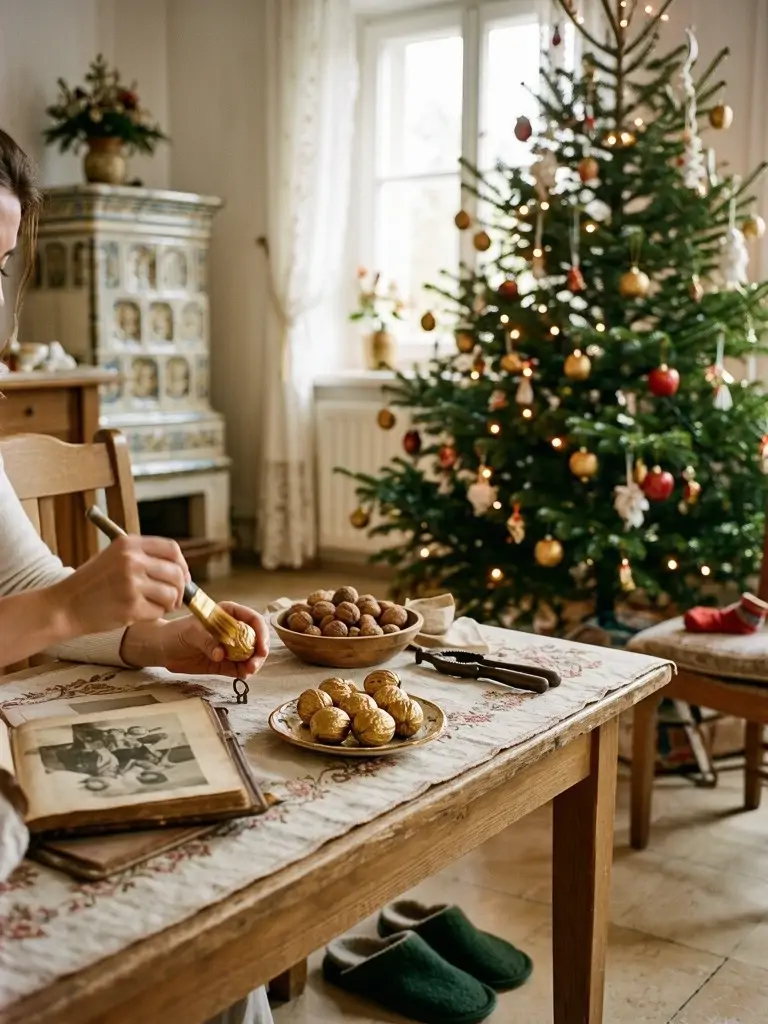
They’re heavy, so hang them on the stronger branches. And don’t use walnuts you’d want to eat later, the paint stays.
Put a handful of walnuts aside when you buy them for the Christmas baking.
8. Dip pine cones in white paint for a snowy look
You’ll need:
- pine cones,
- white chalk paint or white acrylic,
- a paper plate,
- twine.
How long it lasts: many years.
This is the rustic christmas decor idea that costs nothing.
Collect pine cones on a walk, bake them in the oven at a low temperature for about 30 minutes to open them and get rid of any little bugs, then let them cool.
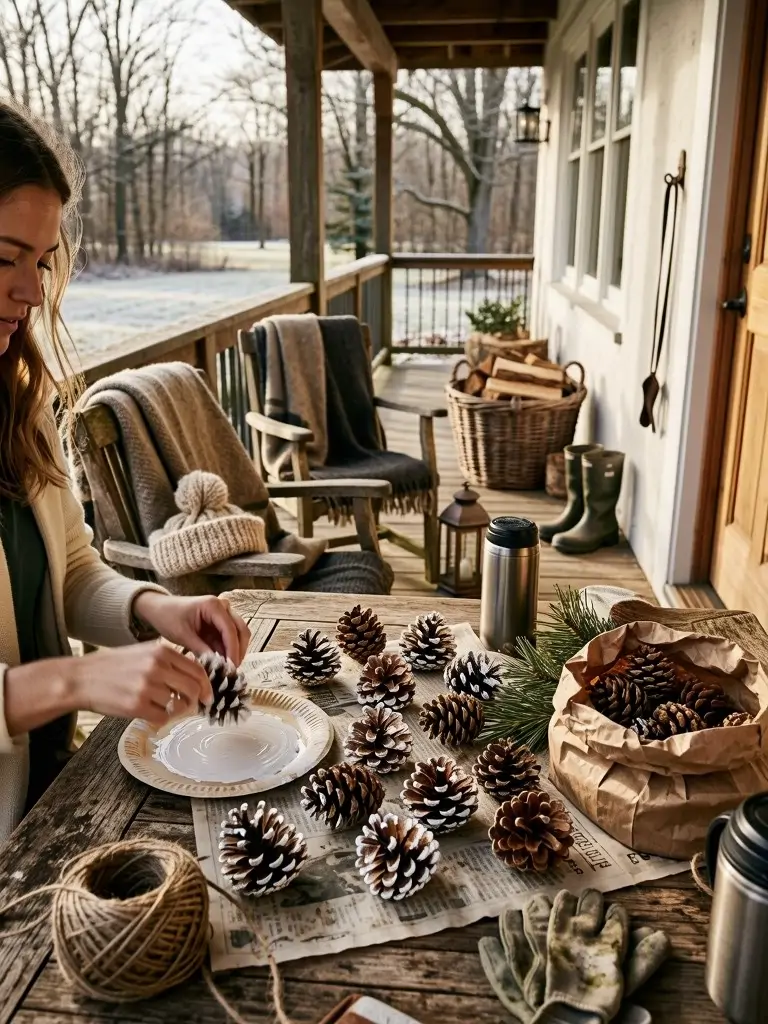
Pour a little white paint on a plate and roll just the tips of the scales in it.
It looks like fresh snow, and you don’t need a single speck of glitter.
Tie a piece of twine around the top scales, and they’re ready.
I keep the small ones for the tree and the big ones for a bowl on the table. Our cat thinks the bowl is for him.
Take a paper bag on your weekend walk and bring home 10 pine cones.
Which ornament on your tree would you be the saddest to lose? For me it’s a salt dough star and 2 old gold walnuts. Neither of them cost anything, and I’d probably cry over both.
9. Write the year on wood slice ornaments
You’ll need:
- wooden slices with a hole,
- a fine paint pen or a wood burning tool,
- twine,
- a little oil or beeswax.
How long it lasts: a lifetime.
This is my favorite of the easy DIY christmas ornaments for adults, because it becomes a family diary. Every year we write something on one wood slice. The year, and sometimes a word or a small drawing.
After 10 years you have 10 slices, and each one remembers a Christmas better than any photo on my phone.
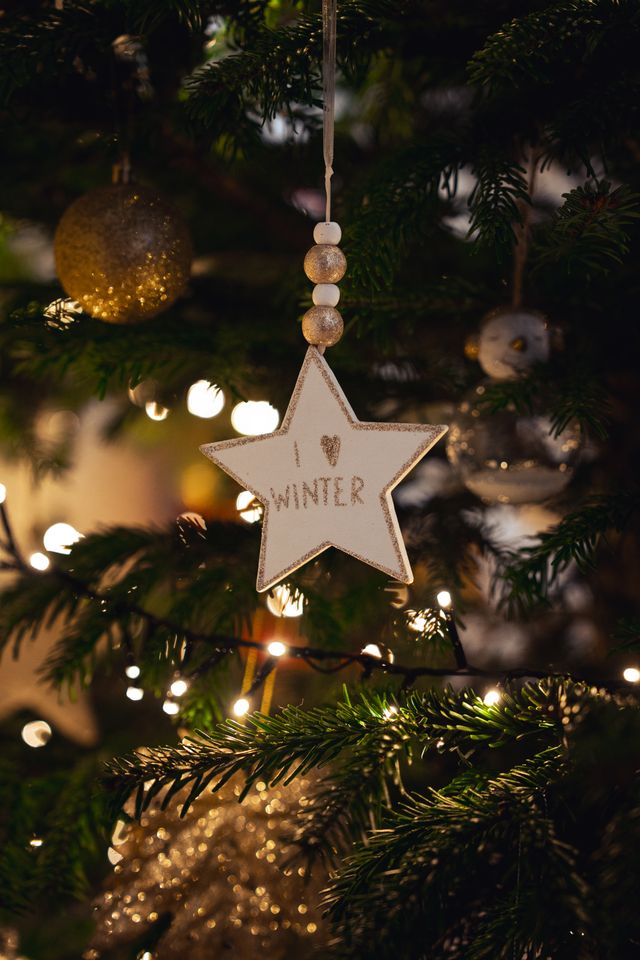
Sand the edges if they’re rough, write or burn your text, then rub a tiny bit of oil into the wood so it doesn’t dry out.
You can cut them yourself from a fallen branch if you have a saw, but a bag of wood slices with holes is cheap and saves a lot of sawdust.
Write this year’s number on one wood slice tonight and put it somewhere you’ll find it in December.
10. Turn family photos into ornaments
You’ll need:
- small printed photos,
- wood slices or small wooden frames,
- glue or decoupage medium,
- ribbon.
How long it lasts: many years, if the photo is sealed.
DIY christmas ornaments with pictures come up in searches every December, and I understand why. A tiny photo of your kids, your parents or your dog on the tree just feels right.
Print the photo a little smaller than the wood slice, glue it on and brush a thin layer of decoupage medium over it. Or put it into a mini frame.
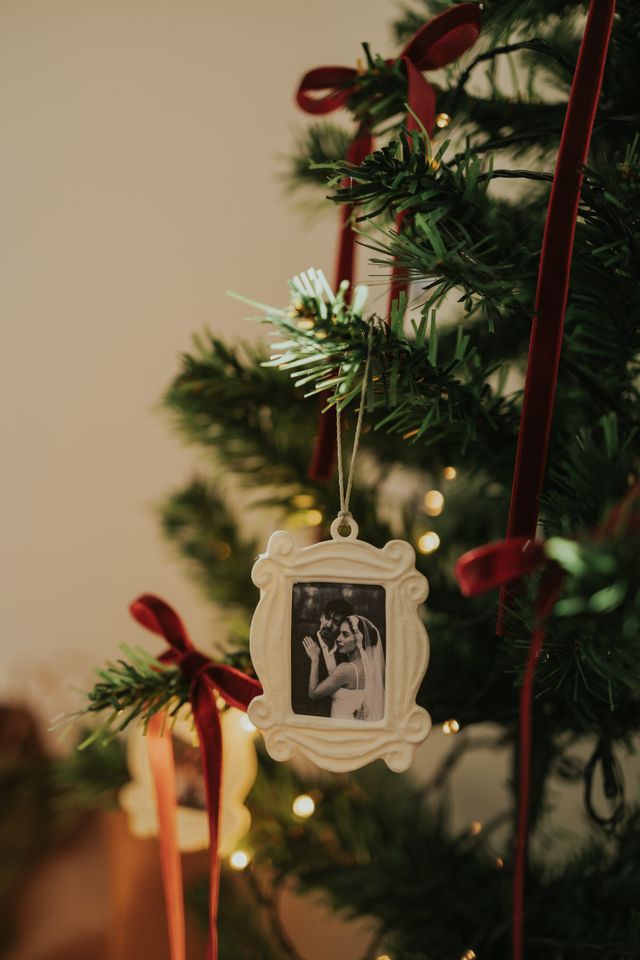
Choose black and white photos if you want them to look calm. Colorful ones next to red and gold can look busy.
My mother cried when she saw her own wedding photo on our tree. In a good way.
Scroll back to last Christmas on your phone tonight and pick 3 photos for this year.
11. Cut felt ornaments from an old wool sweater
You’ll need:
- an old 100 percent wool sweater,
- sharp scissors,
- a needle,
- embroidery thread,
- a little stuffing or wool scraps.
How long it lasts: many years.
This is christmas decor DIY recycled style, and it’s one of my favorites. Wash an old wool sweater on a hot cycle. It shrinks and turns into thick felt that doesn’t fray when you cut it.

It only works with real wool, not acrylic, and not with sweaters marked superwash. Check the label first.
Cut hearts, stars or little mittens, sew 2 pieces together with a simple blanket stitch, and stuff them lightly. They look like they came from an Alpine Christmas market, and they’re made from something that was going to be thrown out.
My husband’s old gray sweater is now 14 hearts. He hasn’t noticed yet.
Look through your closet for one wool sweater with holes or stains, that’s your first felt.
12. Sew fabric scrap hearts, English cottage style
You’ll need:
- cotton or linen fabric scraps,
- a needle and thread,
- dried lavender or cloves,
- a little stuffing.
How long it lasts: many years, the scent for 1 or 2.
Little fabric hearts in checks and small flowers are very English and very cozy. They’re also the easiest sewing project I know.
Cut 2 hearts, sew them together with the right sides facing, leave a small gap, turn them inside out and fill them.
A pinch of dried lavender or a few cloves inside makes the whole tree smell lovely.
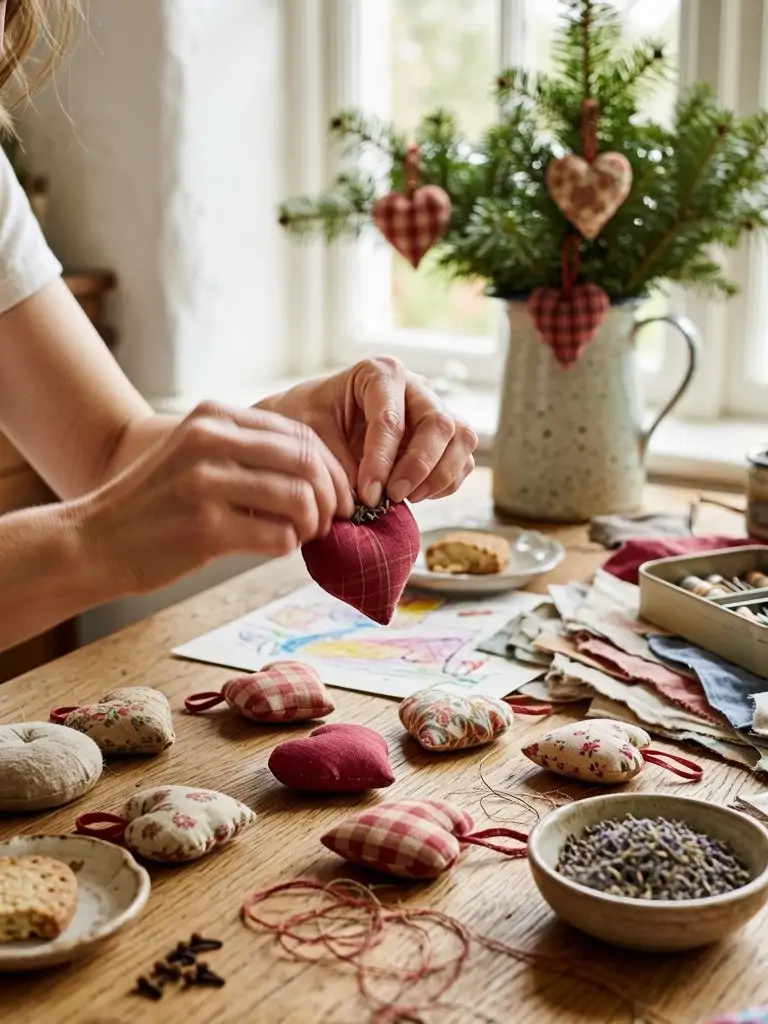
Use shirts that don’t fit anymore, old pillowcases or a worn tea towel. Mixed fabrics look better than matching ones, trust me.
I made my first ones by hand while watching a Christmas movie, and they’re a bit crooked. I keep them because they’re crooked.
Put 3 old shirts or pillowcases in a bag and mark it for Christmas sewing.
13. Stitch tiny embroidery hoop ornaments
You’ll need:
- mini embroidery hoops, about 3 to 4 inches,
- fabric scraps,
- embroidery thread,
- a needle.
How long it lasts: many years.
A small wooden hoop with fabric inside looks sweet on its own. With a simple stitched tree, an initial or one snowflake, it becomes a real little keepsake.
You don’t need to know embroidery. A running stitch and a few crosses are enough.
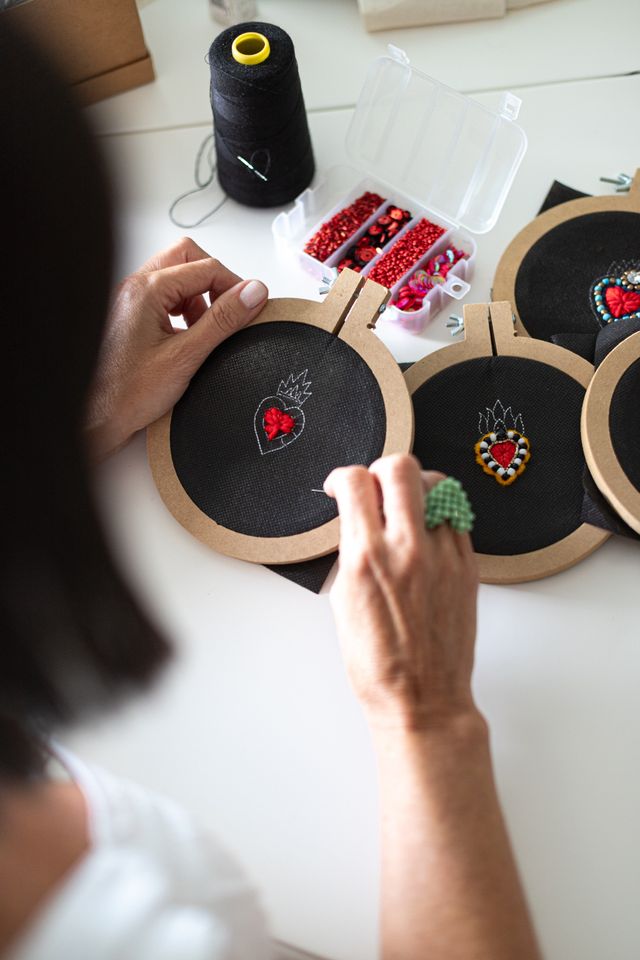
These are also some of the best easy DIY christmas ornaments for gifts, because you can stitch a name. My sister-in-law got one with her dog’s name last year and it’s on her fridge all year round.
Mini wooden embroidery hoops come in sets and cost very little.
Draw a simple tree shape on a fabric scrap with a pencil, then stitch along the line.
14. Fill clear baubles with things you already own
You’ll need:
- clear fillable ornaments,
- glass or shatterproof plastic, and
- whatever you want to put inside.
How long it lasts: as long as the bauble doesn’t break.
If you want easy DIY christmas ornaments that look store bought, this is the one. From a distance, a filled clear bauble looks like something from a department store.
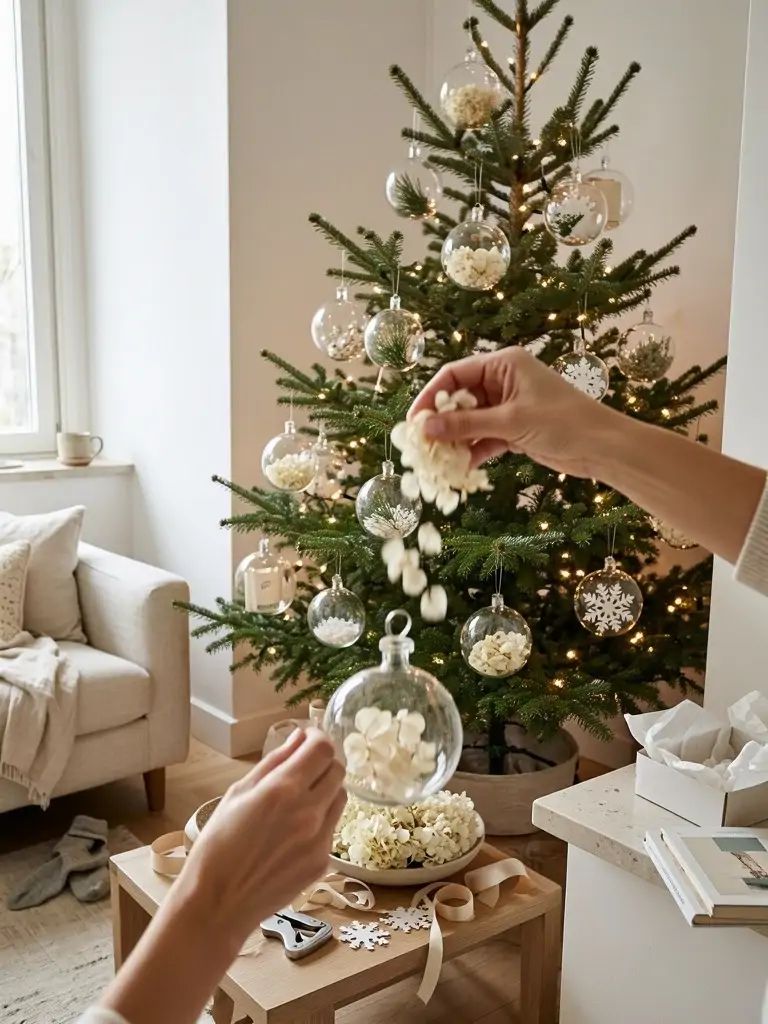
Inside it can be almost anything. Dried hydrangea petals, a tiny pine sprig, leftover ribbon, a rolled up note with a wish, white paper punched into snowflakes.
Keep the filling to one material per bauble. 3 things mixed in one ball look messy.
A set of clear fillable ornaments is one of the few things I think is worth buying, because you can empty and refill them every year.
Open your ribbon box and pick out the leftovers that are too short for a gift, that’s your first filling.
15. Tie simple twig stars with twine
You’ll need:
- 5 straight twigs of the same length per star,
- jute twine,
- a little wood glue.
How long it lasts: many years.
In Scandinavia and much of Central Europe, stars made from twigs and straw are an old tradition. They’re simple, a bit rough, and they look beautiful on a green tree.
Lay 5 twigs into a star shape, overlap the ends and tie each point tightly with twine. A dot of glue under the twine makes it stronger.
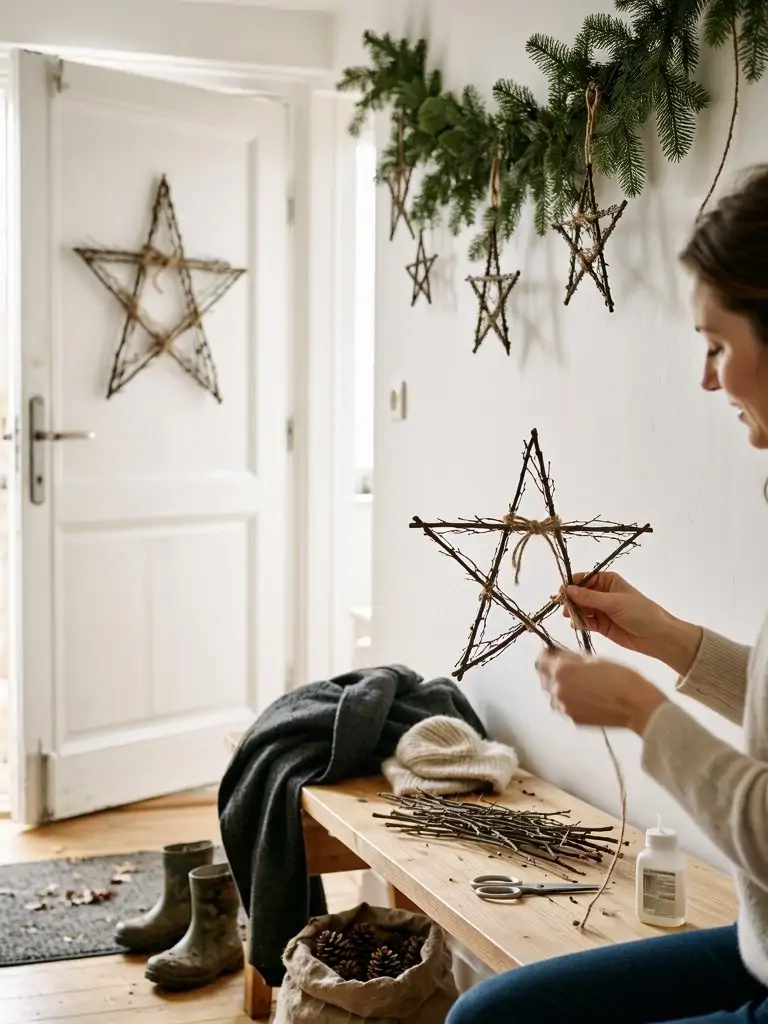
Small ones go on the tree, bigger ones go on the door or the window. I like them best with warm white lights shining through.
This is also a lovely thing to do with kids after a walk, they’re very proud of the sticks they found.
Collect 10 straight twigs on your next walk and make 2 stars while they’re still fresh.
16. Pour beeswax ornaments into a mold
You’ll need: beeswax pellets, silicone ornament molds, a double boiler or a pot with a heatproof bowl, thin ribbon.
How long it lasts: many years, away from heat.
Beeswax ornaments are sold at almost every German and Austrian Christmas market. They’re golden and they smell faintly of honey.
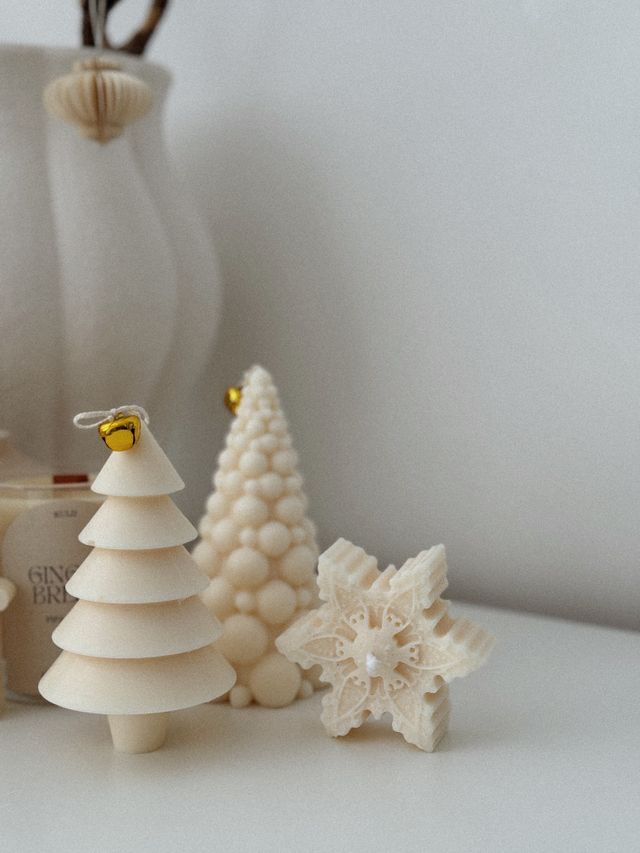
Melt the wax slowly over hot water, never directly on the stove. Pour it into the mold, and when it starts to set, press a small loop of ribbon into the top. After an hour or so you can pop it out.
Keep them away from radiators and hot light bulbs, because beeswax melts at around 145 degrees Fahrenheit. With LED lights they’re completely fine.
Beeswax pellets and a silicone ornament mold are the only things you need to buy, and the mold lasts forever.
Look at the candle leftovers in your drawer, if they’re pure beeswax, you can melt those too.
17. Make mini wreaths from rings and dried greenery
You’ll need:
- small metal or wooden rings, about 3 inches,
- sprigs of rosemary,
- eucalyptus,
- thyme or boxwood,
- thin florist wire,
- thin ribbon.
How long it lasts: the ring forever, the greenery 1 or 2 seasons.
Mini wreaths look very elegant, and they’re some of the easiest natural christmas ornaments DIY lovers can make.
Wind a few short sprigs around the ring with fine wire, only on one side, and tie a small bow at the top.
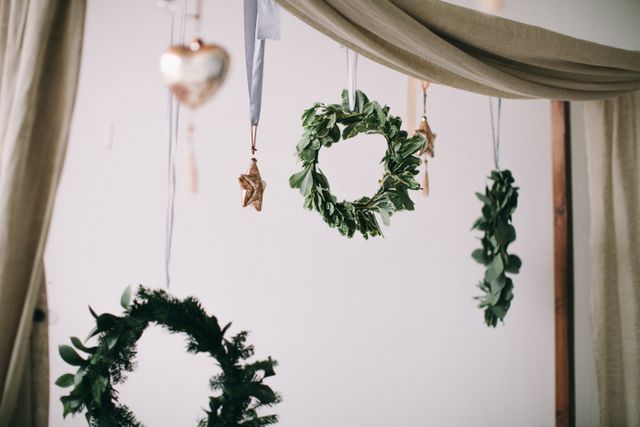
Fresh rosemary dries on the ring and keeps its shape. When the greenery gets tired, you just replace it and keep the ring.
I think they look best on a tree with nothing else green on it, like a white or silver tree, or hung in a window.
Cut a few sprigs from your rosemary or thyme pot and try one wreath this week.
18. Fold paper stars from an old book
You’ll need:
- pages from a damaged old book or old sheet music,
- scissors,
- glue,
- thread.
How long it lasts: many years, stored flat.
In England, paper decorations were a big part of the Victorian Christmas. Folded paper stars, fans and bells made from book pages give the same feeling, a bit old, a bit quiet.
Only use a book that’s already falling apart. Please don’t cut up a good book, I’d feel it from here.
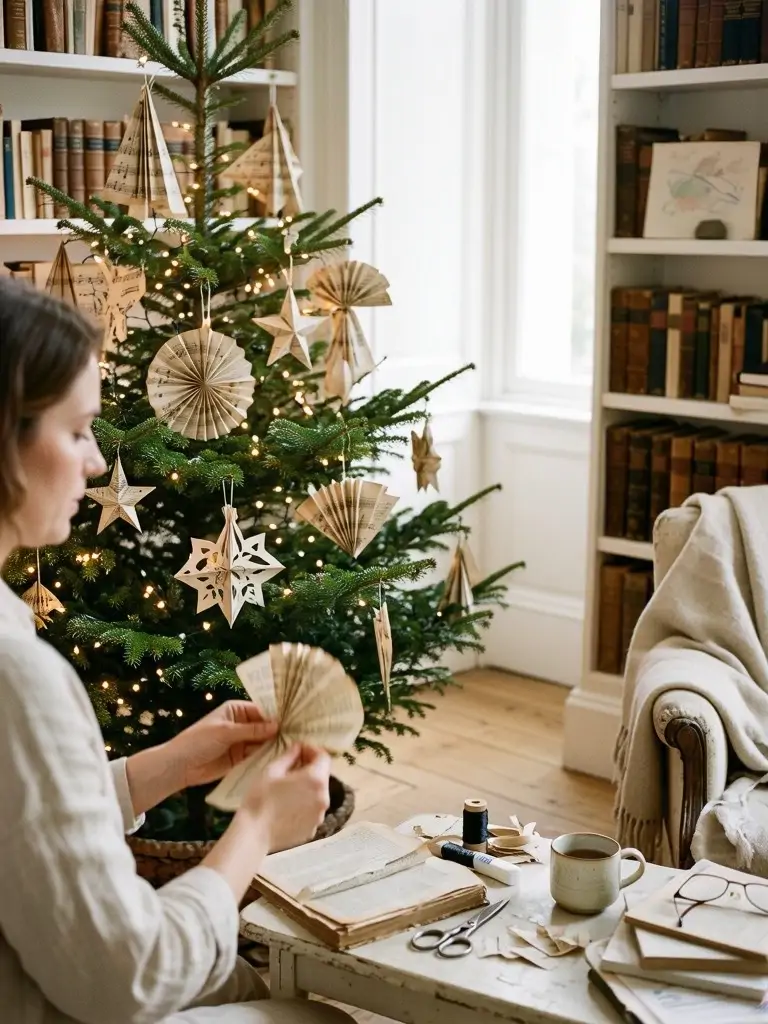
The printed text makes each star look different, even when you fold them all the same way.
On a tree with white lights, they almost glow.
A paper star from 2 folded fans glued back to back is the easiest. You’ll find a simple method in almost every craft book.
Ask at a secondhand bookshop if they have damaged books they can’t sell, many are happy to give them away.
19. Twist wire and bead snowflakes with the kids
You’ll need:
- craft wire,
- wooden or glass beads,
- small pliers.
How long it lasts: many years, they don’t break.
These are my favorite DIY christmas ornaments for kids.
Cut 3 pieces of wire, twist them together in the middle so you get 6 arms, and let the kids thread beads on each arm. Bend the ends so the beads don’t fall off.
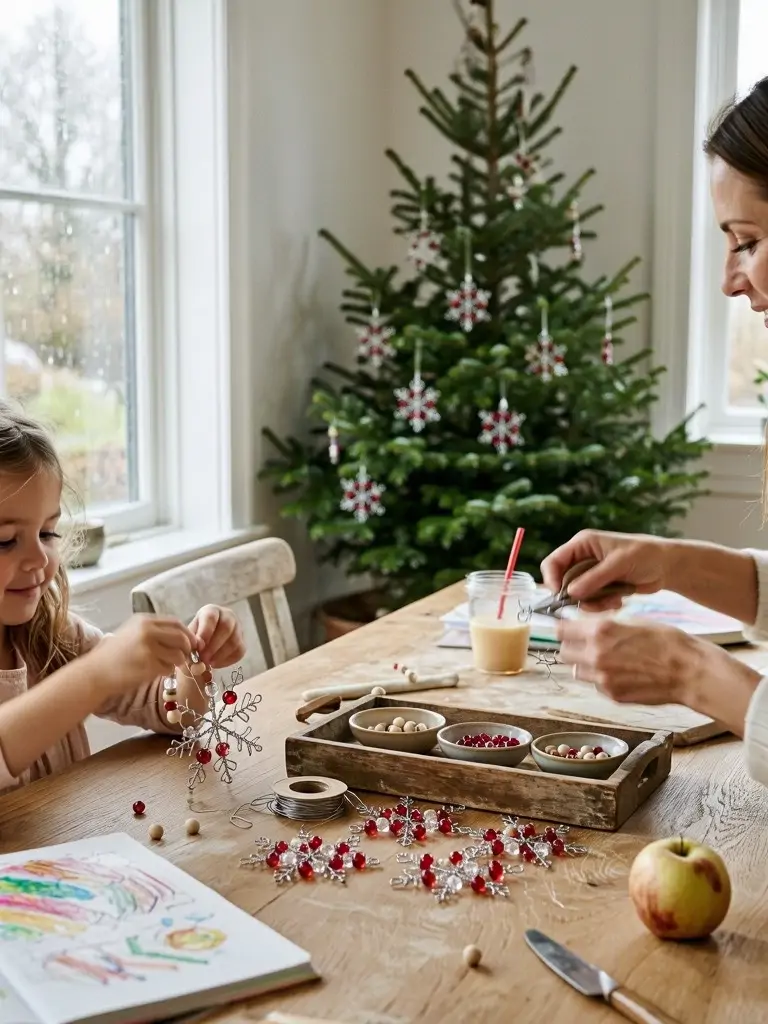
Every snowflake is different, just like real ones. And nothing breaks when it falls off the tree, which in our house happens a lot.
Use wooden beads for a natural tree, clear glass beads if you want them to catch the light.
My daughter made 7 last year and insisted all 7 go at her eye level. They did!
Put a small box of beads and a roll of wire on the kitchen table on the next rainy afternoon.
20. Give a homemade ornament instead of a gift tag
You’ll need:
- any ornament from this list,
- a pencil or paint pen,
- ribbon.
How long it lasts: as long as the person keeps it, and people usually do.
This is my last idea, and maybe my favorite. Instead of a paper gift tag that goes straight into the trash, tie a small homemade ornament to each present. Write the name on the back.
A salt dough star, a wood slice, a felt heart or a gold walnut.
The paper gets thrown away, the ornament goes on their tree.
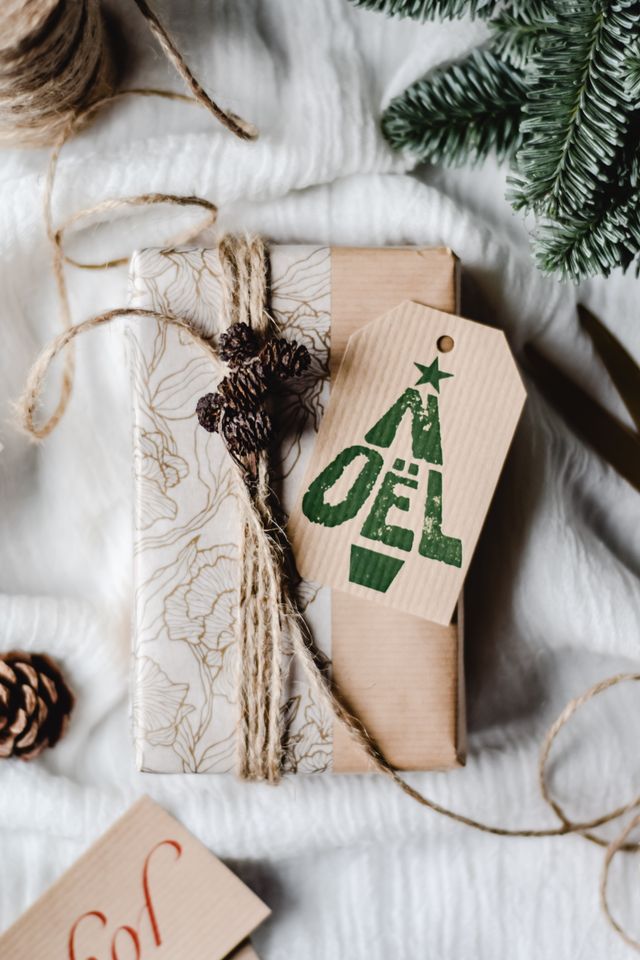
It’s the easiest way to give something handmade without making a whole gift, and it’s one of my favorite easy DIY christmas ornaments for gifts because it costs almost nothing.
My neighbors now hang our salt dough stars every year. One of them told me it’s the first thing she unpacks.
Count how many presents you’ll wrap this year and make that many small ornaments in one weekend.
My Honest Opinion About DIY Christmas Decor
I love making things. But I don’t think every DIY project is a good idea, and I want to say that clearly.
A lot of christmas decor DIY ideas online use more plastic than a store-bought ornament.
Foam balls, plastic gems, hot glue, glitter, spray snow. They look great in a photo, and then they fall apart in the box, and they can’t be recycled.
Glitter is the worst. A study in the Journal of Hazardous Materials found that both regular and so-called biodegradable glitter harmed plants and algae in freshwater over just 36 days. That’s the glitter that goes down the sink when we wash our hands after crafting.
So my rule is simple: if I wouldn’t keep it for 10 years, I don’t make it.
Why still make ornaments at all, then? Because the making itself does something good. A large study of more than 7,000 adults in England found that people who did arts and crafts reported higher life satisfaction and happiness, and a stronger sense that their life was worthwhile.
There’s also a reason we love the things we made ourselves more than the things we bought.
Researchers call it the IKEA effect, and in their experiments people valued the things they had built themselves more highly, even when their work was clearly more amateur than an expert’s.
I see that in our house every year.
The crooked felt heart always wins against the perfect glass bauble.
Here in Hungary, the tree traditionally goes up on Christmas Eve.
When I was a child in my grandmother’s village, the tree had apples, gold walnuts, “szaloncukor” (it’s a traditional Hungarian Christmas sweet and word) and a few paper chains.
That’s it. Nobody thought it was too little.
I think about that tree a lot in November, when the shops are full of new themes for christmas 2026. It’s not that I don’t enjoy looking at them, I do. But I don’t need them.
Related post: If you want to buy less all year, not just in December, I wrote about it in How to Stop Wanting New Things.
Tonight, take out your Christmas box and find the 3 ornaments you love most. Look at what they’re made of. That’s the material to use for your homemade ones this year.
Colors, Pairs and the Mistakes That Make Homemade Look Cheap
This is the practical part. Handmade ornaments can look beautiful or a bit sad on the same tree, and most of the difference is in these small decisions.
Color pairs that always work with handmade ornaments
White clay and natural wood. Calm, modern and perfect for a small apartment.
Red wool and cream linen. The cottage look, warm and a little old-fashioned.
Gold and green. Gold walnuts and beeswax on a dark green tree look very classic.
Orange, cinnamon brown and kraft paper. The natural kitchen tree, and it smells good too.
Black thread and cream paper. Book page stars and a few dark accents look very graphic.
Choose one pair and stay with it.
Related: If you want to see how calm colors work together, I wrote about a Japanese color palette that never goes out of style, and a lot of it works at Christmas too.
Which ornaments go together on one tree
- The kitchen tree: salt dough, cinnamon ornaments, dried orange bundles and walnuts.
- The Scandinavian tree: Danish hearts, Froebel stars, twig stars and white clay.
- The cottage tree: felt hearts, fabric hearts, embroidery hoops and mini wreaths.
- The family tree: photo ornaments, wood slices with years and the kids’ snowflakes.
You can mix them, of course. But a tree built mostly from one group looks planned, and a tree with a bit of everything looks like a craft fair.
Mistakes to avoid
| Making 50 ornaments in one evening. | They all look rushed. Make 5 good ones. |
| Too many colors. | 2 colors plus the green of the tree is plenty. |
| Skipping the varnish on salt dough. | It goes soft and cracks within a year or two. |
| Thin clay or dough. | Anything thinner than about half a centimeter cracks. |
| Hot glue strings everywhere. | Use a little glue and let it dry properly, or tie things with thread instead. |
| Cheap acrylic yarn and plastic beads. | They look shiny and flat in daylight. Wool, wood and glass look better every year. |
| Hanging everything on the branch tips. | Put heavier ornaments like walnuts and beeswax closer to the trunk. |
How to store homemade ornaments so they last
Salt dough and cinnamon ornaments go in a tin box with a small bag of rice or a silica packet. Damp is their enemy.
Paper hearts and stars go flat in a folder or a shoebox, never at the bottom of a heavy box.
Beeswax goes in a cool place, never in the attic over summer.
Dried oranges go in a paper bag, not in plastic, because plastic traps moisture and they can go moldy.
Felt and fabric ornaments go in a cloth bag with a few cloves or a cedar block against moths.
Label the box with what’s inside and the year.
Recommended: If you want more simple habits for a calm home all year, have a look at my minimalist habits for a calm home.
What handmade does for your budget and the planet
Most of these ornaments cost cents, not dollars. A bag of flour and salt makes 30 or more salt dough stars. Pine cones, twigs and rosemary are free. An old sweater makes a dozen hearts.
The real saving comes over the years.
An ornament you make once and use for 10 Christmases doesn’t need to be bought again, and it doesn’t end up in the trash in January.
The planet part is simple too. Wood, paper, wool, wax and fruit break down naturally one day. Foam balls, glitter, plastic gems and spray snow don’t.
In the crafting study I mentioned above, with more than 7,000 adults in England, doing arts and crafts had a bigger effect on feeling that life is worthwhile than having a job did. So a quiet evening with a bowl of salt dough counts for more than you’d think.
What You Need: The Short List
If you just want to know what to get before you start, here it is.
From your kitchen
Flour, salt, cinnamon, applesauce, oranges, cinnamon sticks, star anise, walnuts, baking paper, cookie cutters and a straw for the holes.
From a walk
Pine cones, straight twigs, small sprigs of pine or fir, and rosemary or thyme from the garden or a pot.
From your closet and the recycling bin
An old wool sweater, shirts or pillowcases you don’t wear anymore, leftover ribbon, an old damaged book, and last year’s wrapping paper.
Worth buying once
Air-dry clay, clear varnish, wood slices with holes, mini embroidery hoops, clear fillable baubles, beeswax pellets and a silicone mold, craft wire and wooden beads, jute twine.
Jute twine and a set of wooden beads are used in almost every idea here, so if you buy only 2 things, buy those.
Skip these
Glitter, foam balls, plastic gems, spray snow and cheap plastic ribbon. They look good for one season and then they’re waste.
If you’re still not sure which of the 20 to start with, answer these 5 quick questions and you’ll get the 3 ornaments that fit your time, your home and the people you’re making them with.
Christmas Ornaments Quiz
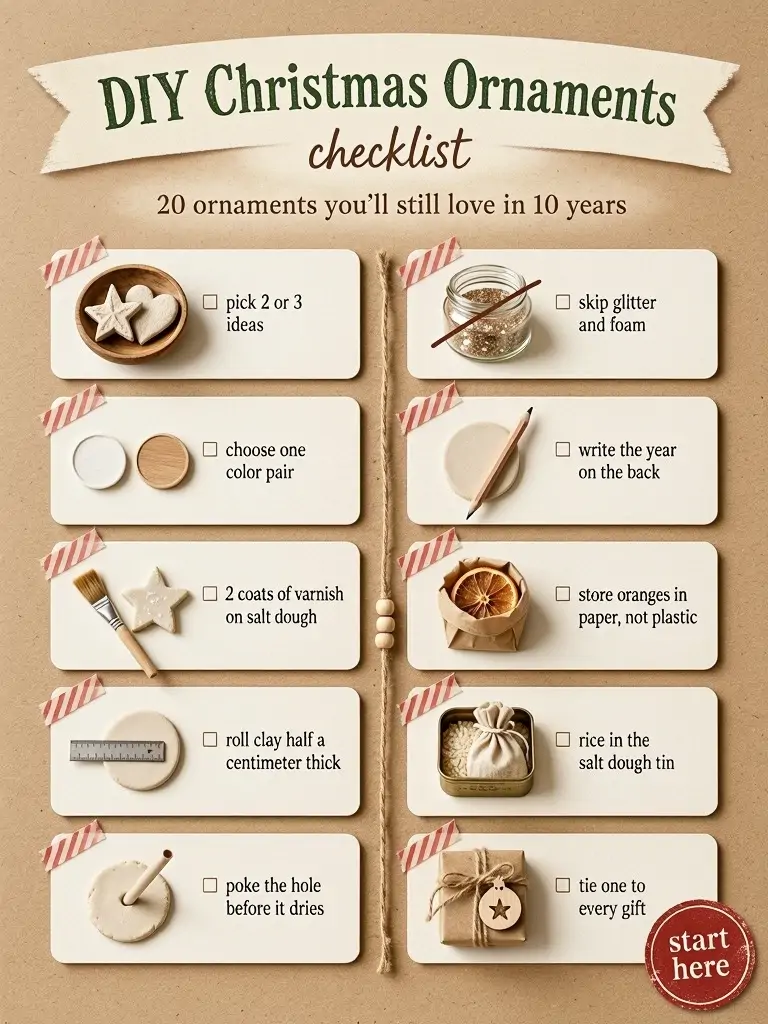
Your DIY Christmas Ornament Checklist
Save this pin for later on your Pinterest board!
DIY Christmas Ornaments: Questions Readers Ask
What are the easiest DIY christmas ornaments to make?
The easiest DIY christmas ornaments are salt dough shapes, dried orange bundles, white-tipped pine cones and twig stars tied with twine. None of them need special skills or tools. Salt dough and pine cones are also the cheapest, because you probably have flour, salt and a park nearby already.
How do you make salt dough ornaments that last for years?
Salt dough ornaments last for years when they’re baked completely hard and sealed with 2 thin coats of clear varnish on both sides. Unsealed salt dough slowly absorbs moisture and goes soft. Store them in a tin with a small bag of rice or a silica packet, away from damp basements and garages.
What are good DIY christmas ornaments for adults?
Good DIY christmas ornaments for adults are Froebel paper stars, white clay stars with pressed greenery, beeswax ornaments and wood slices with the year written on them. They take a bit more patience than kids’ crafts, but they look like something from a shop and they last for many years.
How can I make homemade ornaments look store bought?
Homemade ornaments look store bought when you keep the colors simple, use natural materials like clay, wood and glass, and make them the same size. Clear fillable baubles with one filling, white clay stars and gilded walnuts are the easiest. Mixing too many colors and materials is what makes them look homemade in a bad way.
Which natural materials can I use for christmas ornaments?
Natural materials for christmas ornaments include dried orange slices, cinnamon sticks, star anise, pine cones, twigs, walnuts, beeswax, wool, wood and paper. Most of them are free or very cheap. Dry everything well before you hang it, and store it in paper or cloth instead of plastic so it doesn’t get moldy.
How long do cinnamon ornaments keep their smell?
Cinnamon ornaments keep a noticeable smell for about one or two seasons, and after that it slowly fades. The ornament itself can last several years if it stays dry. To bring the scent back, rub a drop of cinnamon essential oil on the back, or put them in a closed box with a few cinnamon sticks over summer.
Are DIY christmas ornaments cheaper than store-bought ones?
DIY christmas ornaments are usually much cheaper than store-bought ones, especially salt dough, cinnamon, pine cone and twig ornaments, which cost only cents each. The real saving comes over time, because a well-made homemade ornament can be used for 10 years or more instead of being replaced when the trend changes.
What are good DIY christmas ornaments to give as gifts?
Good DIY christmas ornaments to give as gifts are wood slices with a name and year, embroidery hoop ornaments, photo ornaments and felt hearts. Personal details make them special. You can also tie a small homemade ornament to a present instead of a paper gift tag, so it ends up on their tree instead of in the trash.
When should I start making christmas ornaments?
The best time to start making christmas ornaments is in November, so you can make a few each week without rushing. Salt dough, clay and cinnamon ornaments need a few days to dry, and oranges need a whole afternoon in the oven. Starting early also leaves time to make some as gifts.
Recommended Reading
Christmas Tree Ideas 2026: 20 Beautiful Trees You Can Reuse for Years
Slow Living in Fall and Winter: 15 Gentle Habits for Heavy Seasons
What a Minimalist Birthday Party Really Teaches Kids About Enough
The 2 Gold Walnuts Older Than Me
Every December, when I open the box, the first thing I look for are the 2 gold walnuts from my grandmother’s tree. The paint is a bit worn now. One of them has a tiny crack.
They’re not pretty in the way a new ornament is pretty. But they’ve been on a tree every Christmas for longer than I’ve been alive, and for me, that is what makes them truly precious and timeless.
Maybe one day my kids will look for a salt dough star with a handprint in the same way. I hope so.
Which one of these 20 ornaments would you like to make first this year?
You Might Also Like
-
Sweater Outfits: 11 Fresh Ways to Wear One Burgundy Sweater All Winter
In this post I’ll show you how to wear one burgundy sweater 11 different ways, from a Monday at the office to Christmas Eve dinner. You’ll also find color pairs, the mistakes that make a knit look tired, and simple care tips that keep it soft for years.
-
Christmas Savings Challenge: A Printable Tracker for Weekly and Biweekly Paydays
This christmas savings challenge turns the cost of December into small, planned amounts you set aside from now until the holidays. You’ll find 8 simple challenges with the real math for weekly and biweekly paydays, plus a free printable tracker to color in.
-
Christmas Mantle Ideas: 13 Calm Looks With Zero Clutter
These christmas mantle ideas help you build an elegant fireplace display that looks calm instead of crowded. You’ll find 13 looks, from a lush garland with burgundy velvet to a mantel with a TV above it, plus color pairs and the mistakes worth skipping.