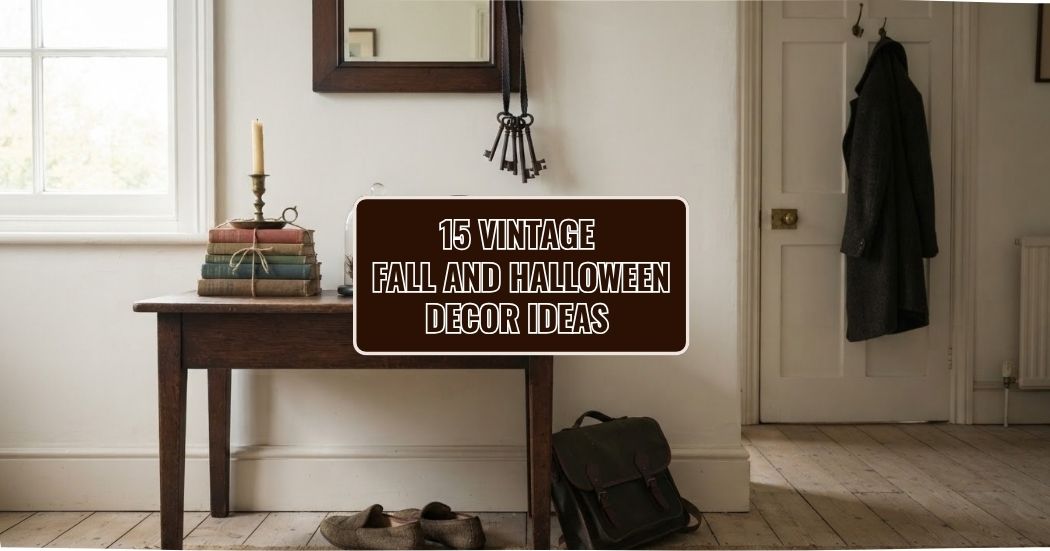
15 Vintage Fall Decor Ideas That Also Work for Halloween
Disclosure: This post contains affiliate links. If you make a purchase through these links, I may earn a small commission at no extra cost to you. Thank you for supporting my blog!
Walk down any Halloween aisle in the middle of October and look at what’s actually on the shelf. Purple plastic, green plastic, a skeleton with a glow in the dark rib cage.
Now picture a shelf with 4 amber glass bottles on it, a stopped clock and a stack of old books tied with twine. Same holiday, completely different feeling.
The second one costs less. That’s the part that surprised me.
I got into this the slow way. My mother in law has a box of things from her own mother, and one October we pulled out a tin lantern with the paint half gone. We put a candle in it, stood it by the door, and it looked better than anything I’ve ever bought in a shop.
Old things already have the one quality that Halloween decor is usually trying to fake, which is age.
You don’t have to add it. You just have to find it.
You will find in this post:
- 15 vintage halloween decor ideas for indoors and for the porch, each one marked as make it, find it or buy once, so you can skip whatever doesn’t fit your home
- the practical part after the list, which colors hold this look together, how to age paper without ruining it, and the 4 mistakes that make vintage decor look like a costume shop
- a saveable checklist,
- a long question and answer section, and
- a few more articles from the blog if you want to keep going.
What Is Vintage Halloween Decor?
Vintage halloween decor means seasonal decorating built on old or old looking materials, paper, glass, tin, wood and lace, instead of printed plastic. It borrows the look of the 1920s to 1950s, when Halloween decorations were mostly die cut card and candlelight.
Most of the ideas on this list cost under 10 dollars, and about half of them cost nothing at all because the materials are already in your house.
The way I see it, this is the easiest version of Halloween there is. Old things do the work for you, and nothing on the list is frightening enough to upset a small child.
When you picture the Halloween you’d actually like to have at home, is there a single piece of plastic in the picture? Mine had candlelight, paper and a cat sitting where she shouldn’t be.
15 Vintage Halloween Decor Ideas That Look Like They’ve Been in the Family
Roughly in order from the living room to the front gate. Each one is marked make it, find it or buy once.
1. Cut a garland from a book that’s already falling apart
Make it. Before anyone writes to me, I’m not suggesting you cut up a good book.
I mean the paperback with the cracked spine and the missing cover that’s been in the bottom of a box for 6 years.
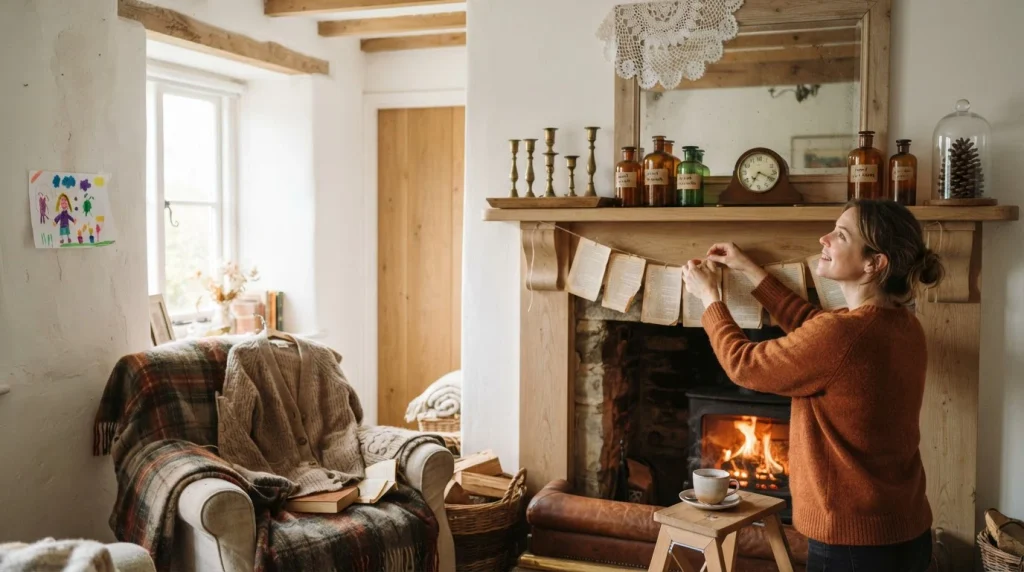
Tear the pages out, cut simple shapes, bats or plain circles or just torn strips, and string them on cotton thread with a needle. Yellowed paper does the aging for you.
The uneven edges are the point.
A hand torn edge reads as old, and a scissor straight edge reads as a craft project, so leave some of them rough.
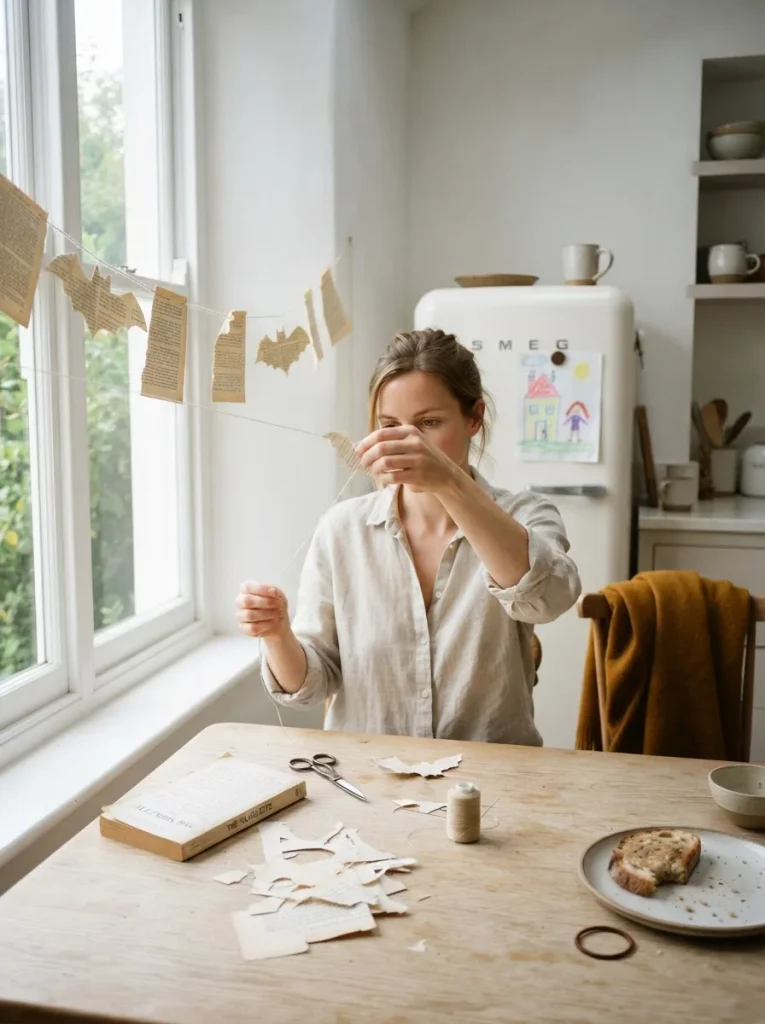
Ours hangs across the kitchen window every October and goes into an envelope in November. Paper stores flat forever if you keep it out of the garage.
If you want the shapes to look genuinely antique, look at the old American die cut decorations from the 1920s. That’s the whole visual language this list borrows from.
Tear the first page rather than cutting it and see which edge you like better before you commit to 30 of them.
2. Turn empty bottles into an apothecary shelf
Make it. Save 5 or 6 bottles in different shapes over a couple of weeks.
Olive oil, vinegar, a small jam jar, an old medicine bottle if you have one.
Soak the labels off in warm water. Then cut new labels from plain paper, write words on them in ink, and tea stain them: one used teabag, a saucer of water, 20 minutes, then dry them flat on a radiator.
Write whatever amuses you. Ours say things like Bitter Root and Rain Water, and my daughter insisted on one that says Cat Hair, which honestly is the most accurate bottle in the house.
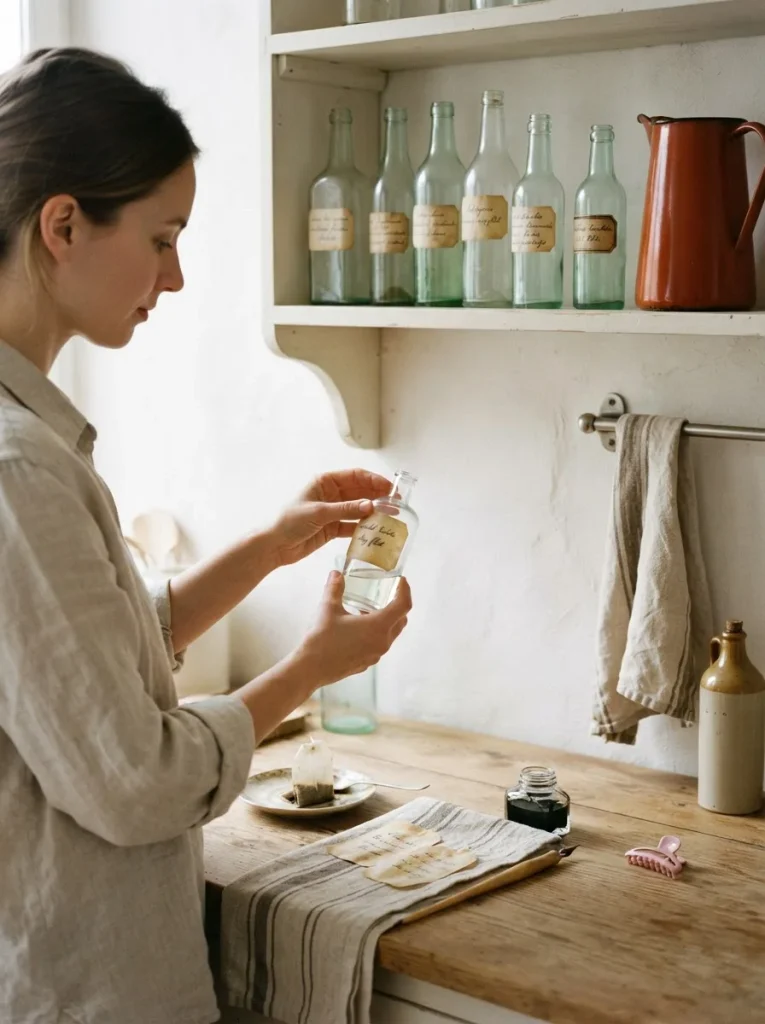
Glue them on with a normal glue stick, slightly crooked. Perfectly straight labels are the fastest way to lose the effect.
A row of them on a kitchen shelf costs nothing and stays up until Christmas if you like it.
Start saving bottles now, this is the one idea on the list that needs a few weeks of lead time.
3. Hang black paper silhouettes in mismatched frames
Make it and find it.
Charity shops and flea markets are full of small picture frames nobody wants, usually under 2 dollars each.
Buy 5 or 6 in different sizes and finishes, and mismatched on purpose.
Cut a plain black paper shape for each one: a cat, a bird, a simple profile of a face. Keep them simple, the outline does all the work.
Lay the black shape on cream or tea stained paper, put it in the frame, then hang the whole group tightly together on one wall or up the stairs.
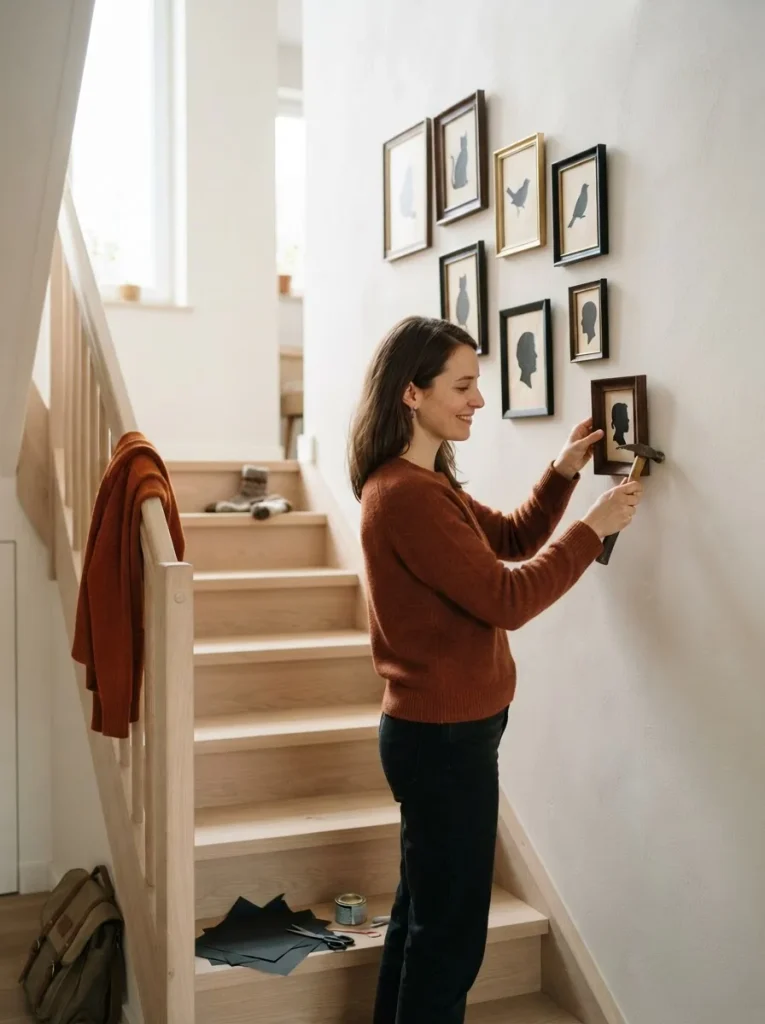
Honest bit, the first cat I cut looked like a badly made rabbit. The second one was fine. Nobody has to see the first one.
If you like this kind of wall, the same grouping principle sits behind my post on minimalist plant wall art, only with leaves instead of cats.
Cut 3 sizes of the same shape and put the smallest at the top of the group, it gives the wall depth straight away.
4. Group brass and pewter candlesticks from the flea market
Find it. This is my favorite thing to hunt for, and old candlesticks are one of the few genuinely cheap things left at a flea market, because most people want them polished and matching.
Buy them tarnished.
The dark, slightly greenish brass is exactly the look you’re paying extra for in the shops, so leave it alone.
Collect them slowly over a year, 4 or 5 of clearly different heights, and group them all on one tray.
A group reads as a collection. The same candlesticks spread around the room read as clutter.
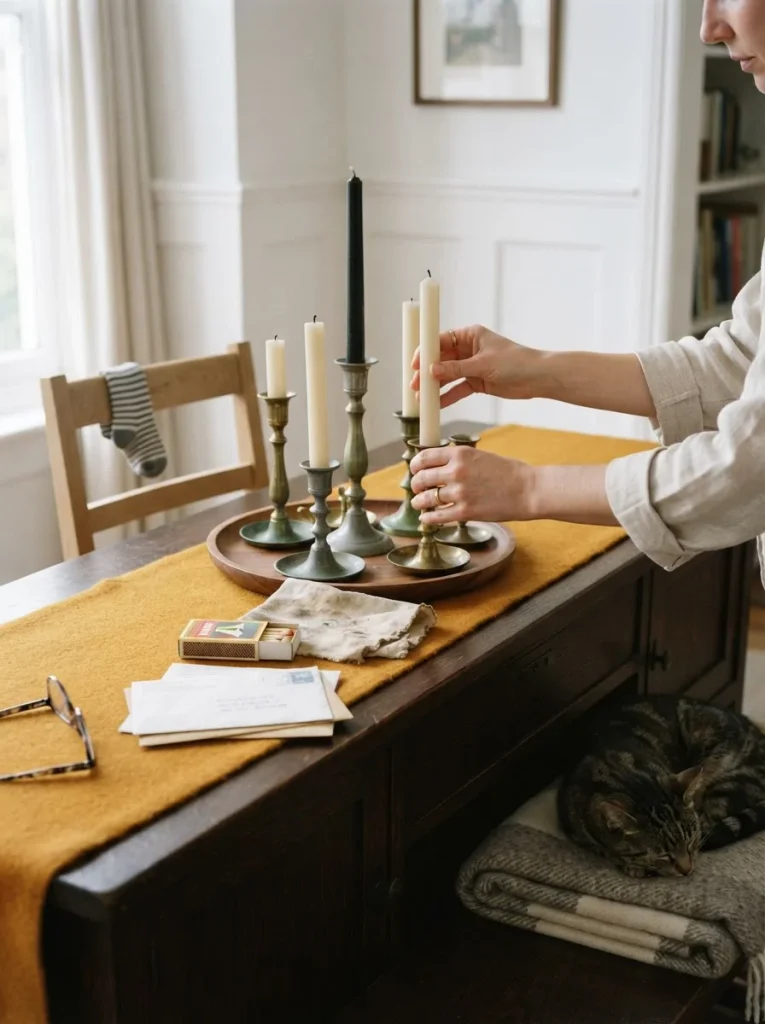
If you don’t have a flea market nearby, vintage style brass candlesticks cost about the same and look right after one season of being handled.
Plain cream or black candles, nothing scented.
Put the tallest one off center rather than in the middle, the whole group looks less staged that way.
5. Drape a crocheted doily over a mirror as a cobweb
Find it (for example on Etsy).
Every thrift shop has a basket of doilies that nobody under 70 wants, usually for less than a dollar. They are the best fake cobwebs ever made, and it’s not close.
- Drape one over the top corner of a mirror, let it hang.
- Pin another one loosely across the corner of a bookshelf.
The lace pattern does what that stringy plastic web stuff is trying to do, except it doesn’t tear, doesn’t stick to the paint and doesn’t end up in the bin on November 1.
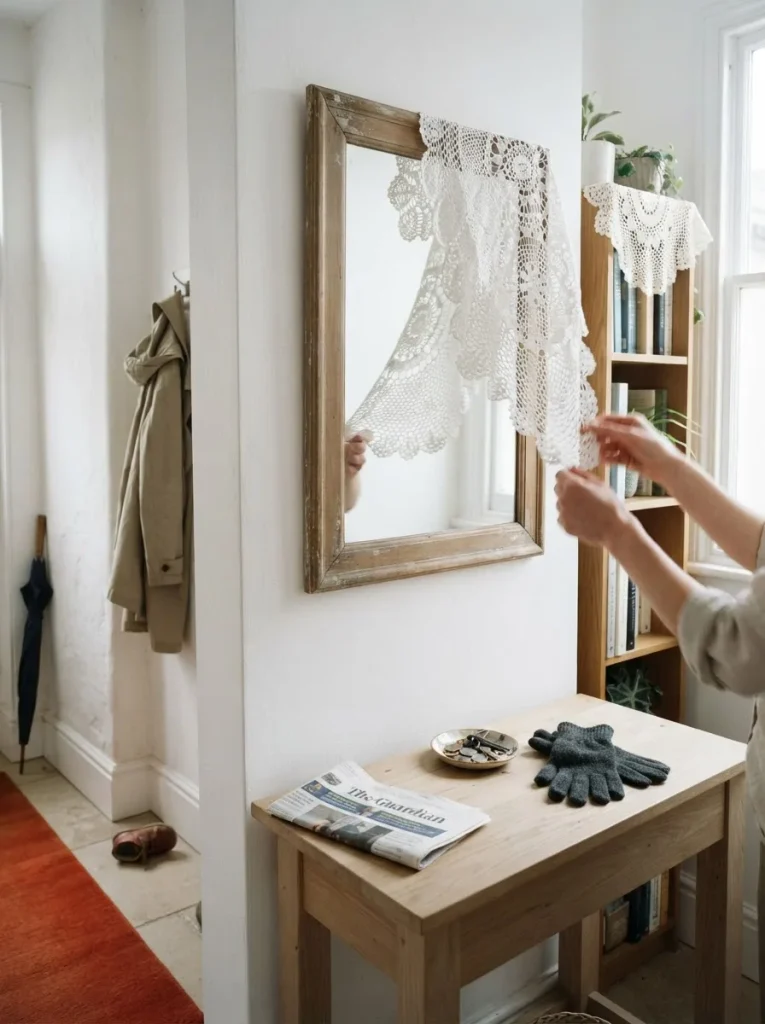
My grandmother crocheted, so we have a few of hers, and I’ll admit I like using them for this more than I like them on the back of an armchair.
If you can’t find any locally, white cotton crochet doilies come in packs and cost very little.
Use 2 sizes rather than 4 matching ones, uneven always looks more like a real web.
6. Stop an old clock at midnight
Find it. A non working mantel clock is one of those things that sits in a charity shop for months because it doesn’t tell the time. For this it doesn’t need to.
Set the hands to midnight, put it on the shelf, done. That’s the entire idea and it takes 10 seconds.
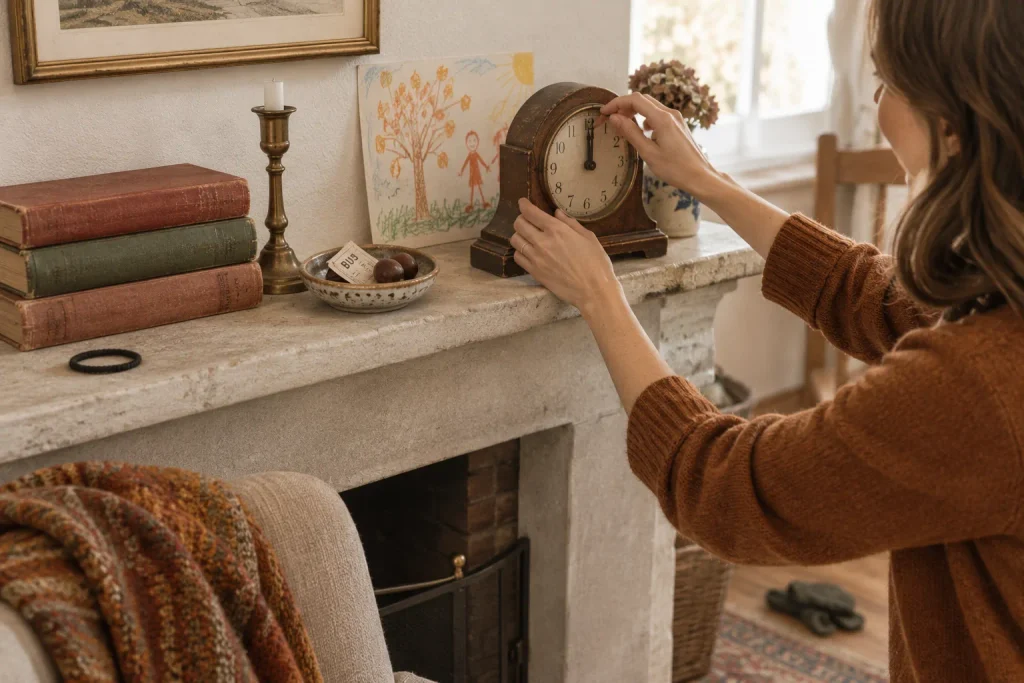
It’s the quietest joke in the house and people notice it on the second or third visit. One object that makes somebody smile does more than a whole shelf of things that only say Halloween.
Ours is a small wooden one with a cracked face that cost about 4 dollars. It goes back in the cupboard in December and comes out again every October.
Check the thrift shop shelf for a broken clock now, the good ones go early in the season.
7. Put one found object under a glass cloche
Buy once. A glass cloche is the only thing on this list I’d tell you to spend real money on, because a good one lasts a lifetime and works for every season.
Under it goes exactly one thing. A large pine cone, a bird’s nest that fell out of a hedge, a chunk of bark, a single dried hydrangea head.
The cloche is what turns an ordinary object into something worth looking at. It’s a museum trick and it works every time.
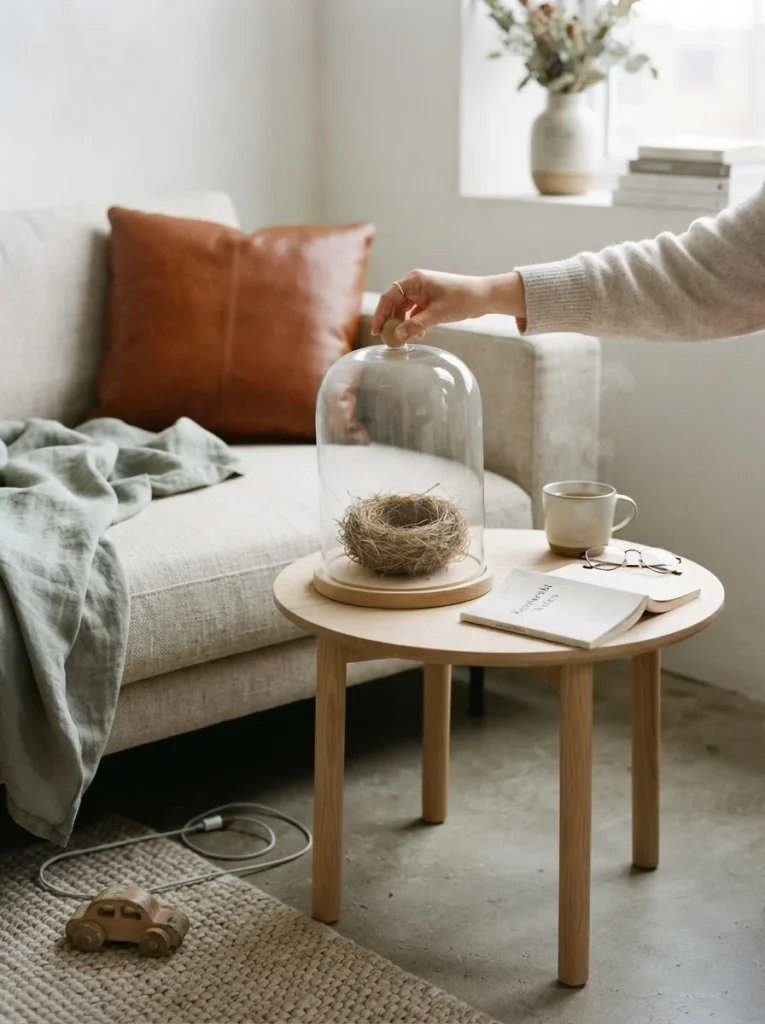
Then in December the pine cone comes out and a candle goes in. In spring it’s a bulb in a small pot.
Here’s the thing I keep coming back to. A cloche doesn’t make the object special, it just tells your eye to slow down and look, and that’s most of what decorating is.
Put something you found outdoors under it rather than something you bought, that’s where the whole effect comes from.
8. Stack old books and tie them with twine
Gather it.
Look along your own shelves for the books with the most worn spines, the ones in dark red, brown and faded green. Take out 4 or 5.
Stack them largest at the bottom, tie the stack with garden twine, and use it as a riser under a candlestick or the cloche. The height difference is what makes a shelf look arranged rather than lined up.
Take the dust jackets off.
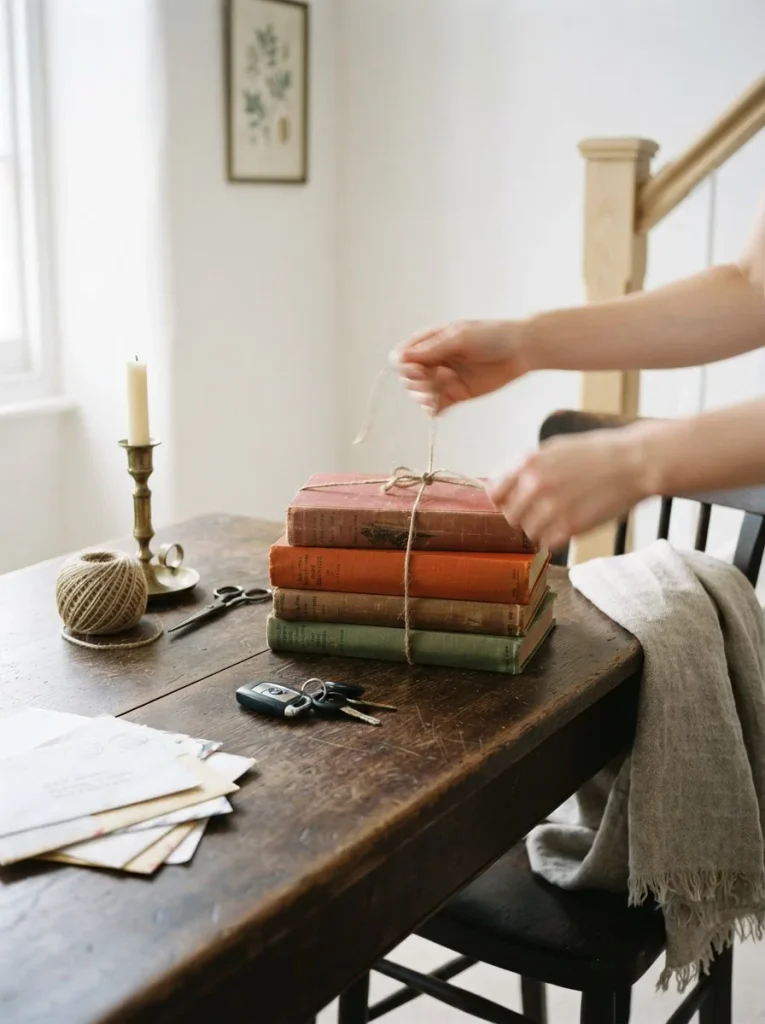
The cloth underneath is almost always better looking, and it’s the part that reads as old.
I keep a stack like this on the hall table from October to February and just change what sits on top of it.
Turn the spines inward if the titles are distracting, the block of worn cloth is prettier than the words anyway.
Americans spent 4.2 billion dollars on Halloween decorations alone in one season, out of 13.1 billion in total, and 78 percent of shoppers bought something for the house or the yard. Meanwhile the secondhand market is heading toward 393 billion dollars by 2030. The old version of this holiday is getting easier to shop, and the new version is getting more expensive.
9. Fill an amber vase with dried statice
Buy once.
Dried flowers are the vintage shortcut nobody talks about. Statice and immortelle hold their color for years, they cost a few dollars a bunch, and they look like something pressed in a book in 1940.
Put them in amber or smoked glass rather than clear.
The tinted glass is what pushes the arrangement out of farmhouse and into old.
Deep rust, dusty pink and the dried papery cream tones all work here. Skip anything dyed bright orange, it undoes the whole effect in one move.
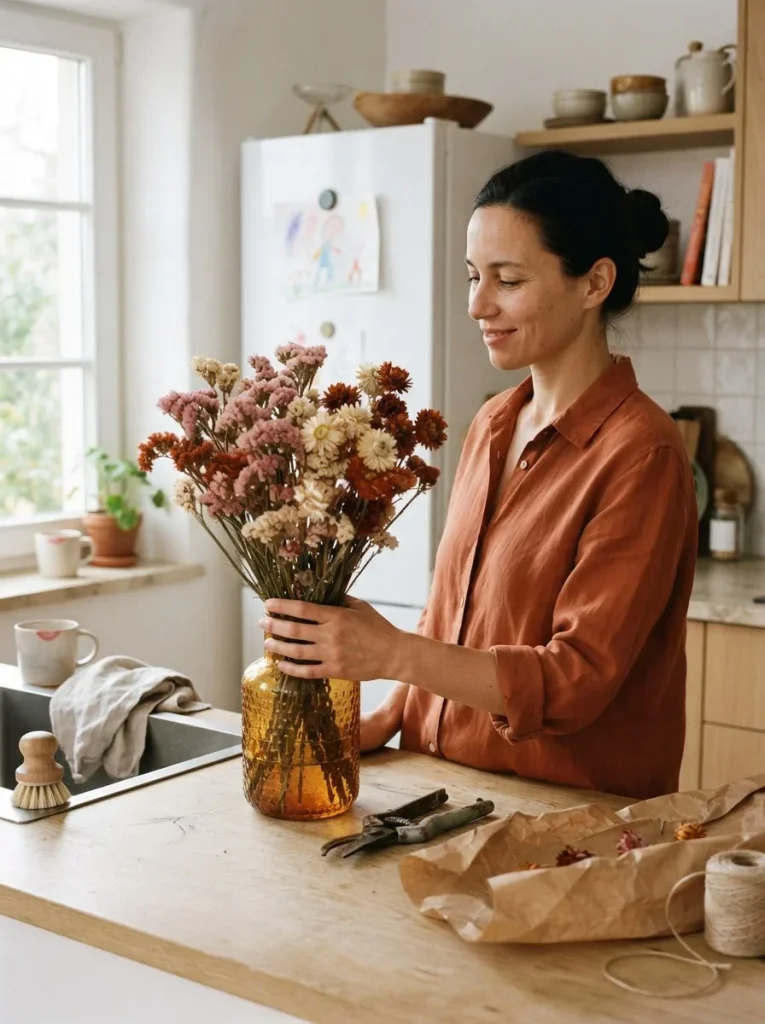
Dried statice bunches last several seasons if you keep them out of direct sun. Mine are on their third autumn and they’ve only gone slightly paler.
If you like working with dried plants, there’s more of this in my post on minimalist flower home decor.
Shake the dust off outside once a season and they’ll keep going for years.
10. Hang an old tin lantern by the front door
Find it.
This is the piece that started the whole thing for us. An old tin or iron lantern with chipped paint, a candle inside, hanging on a hook by the door.
Look for them at flea markets, in garages and in the camping section of charity shops.
Old railway lanterns and oil lamps also work, and nobody wants them because they don’t run on anything modern.
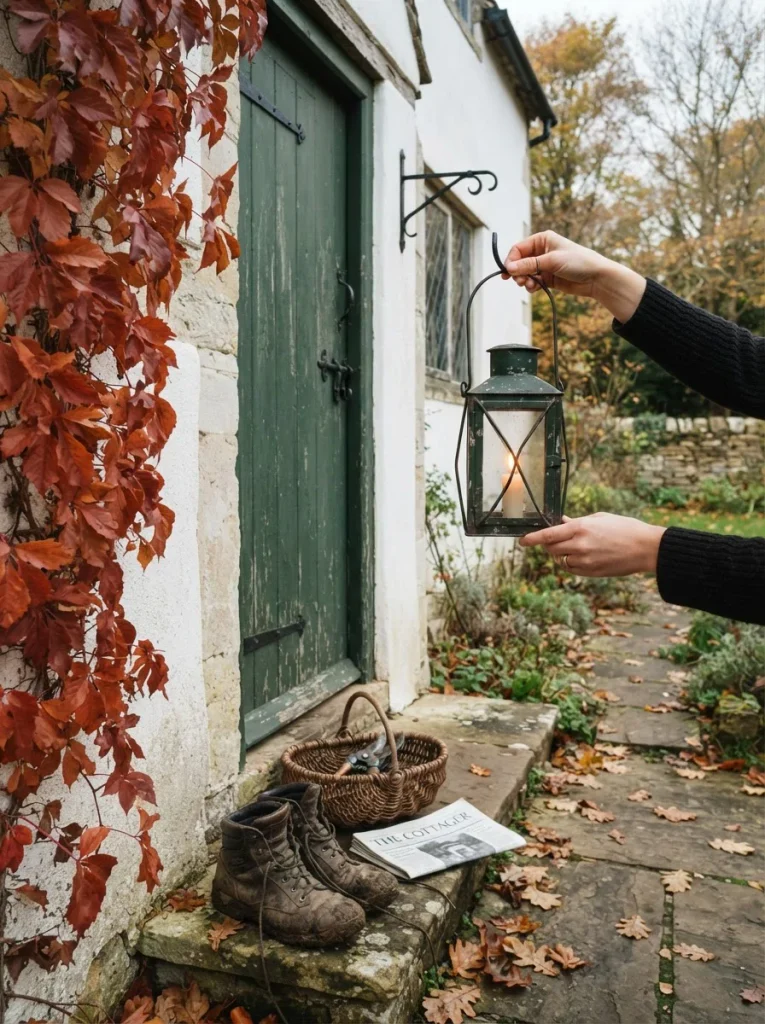
Use an LED candle if it hangs where the wind gets it. A real flame in a hanging lantern goes out in about 20 minutes on a windy October evening, and then you’re standing on the step with a lighter feeling foolish.
Chipped paint is the feature, not the flaw. Don’t repaint it.
If nothing turns up locally, a vintage style tin lantern is inexpensive and weathers within a season outdoors.
Hang it slightly lower than you think, around eye level, so the light falls on the step rather than over it.
11. Put one cut paper shape in a lace curtained window
Make it.
This is the highest impact idea on the list and it costs about 50 cents.
Hang a plain lace or muslin curtain in one window. Behind it, tape a single black paper shape to the glass: a cat sitting, a bird, a plain arched shape like a doorway.
Then put a lamp on behind the curtain in the evening. From the street you get a soft silhouette through the lace, and it looks like something from an old film.
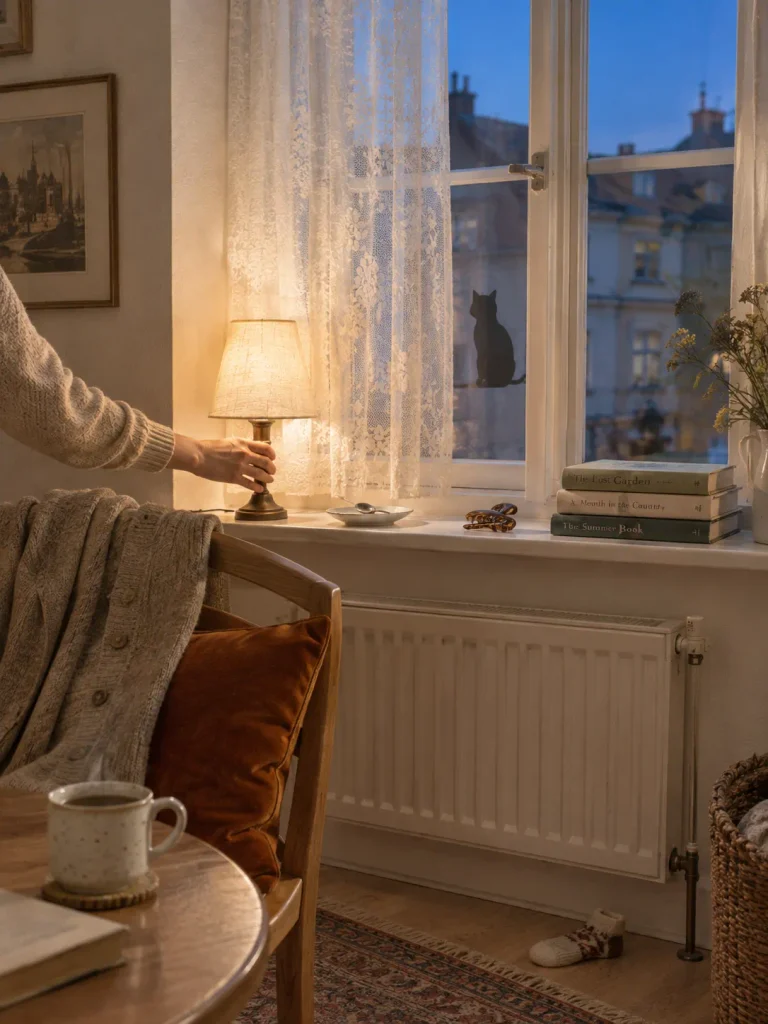
One shape per window. Two makes it a scene, and a scene is where it starts looking like a shop display.
My son was the one who worked out that the shape has to be closer to the lamp than to the glass to look properly soft. He was right and I’ve never told him how right.
Try the lamp in 2 positions before you tape anything, the shadow changes completely with 30 centimeters.
12. Line the steps with green and amber glass bottles
Gather it. Wine bottles, olive oil bottles, anything in green, brown or amber glass. Save them for a few weeks, soak the labels off, line them along the edge of the steps or the path.
Drop an LED tea light into the neck of each one, or stand a short candle on the rim if the bottles are wide enough.
The colored glass throws a completely different light than clear jars do, warmer and deeper, and much more 1930s.
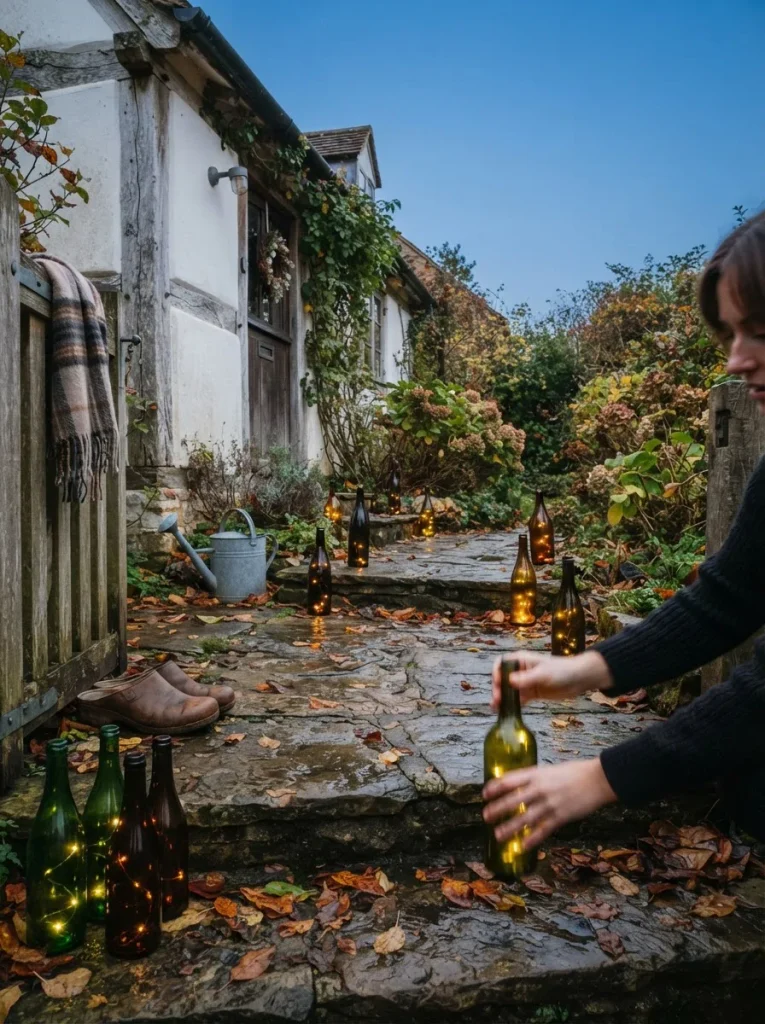
Space them further apart than feels right, about a meter, so the path glows instead of looking like a runway.
Bring them in when the weather turns. Glass on a wet step is a genuinely bad idea, and I say that as somebody who found out the hard way.
Sort the bottles by color and put all the green together at one end, the gradient looks deliberate.
13. Make a wreath from dried hops or old lace
Make it. Skip the plastic wreath entirely. A bare twig ring wrapped with dried hop vine costs nothing if hops grow anywhere near you, and they grow like weeds in most of Europe.
No hops? Wrap the ring with a torn strip of old lace curtain or a length of tea stained cotton instead, leaving the ends hanging long.
Tie it off center. A bow in the middle is the difference between a wreath that looks handmade and a wreath that looks like a hobby.
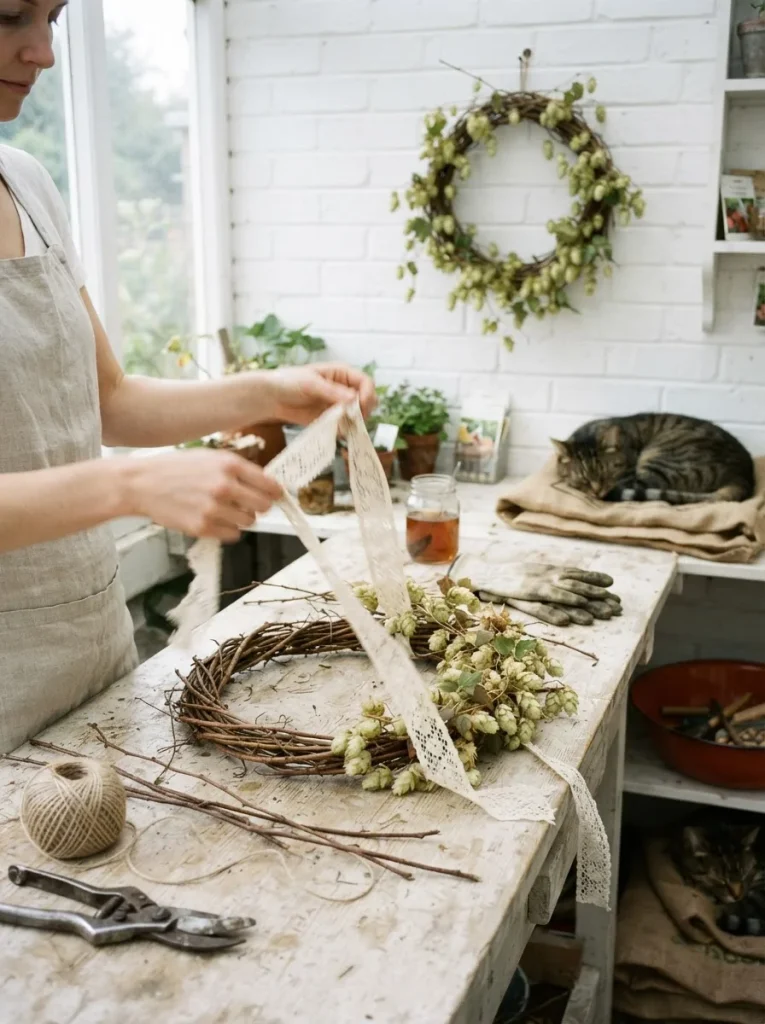
Ours has been through several winters now. In November the black bits come off and the same ring goes back up bare for Advent.
This is the idea I’d start with if you only try one thing from the list, because it’s the piece people see first.
Cut the twigs fresh and bend them the same day, dry ones snap in your hands.
14. Stand an enamel bucket of corn husks by the door
Find it. Old enamel buckets, milk cans and watering cans turn up everywhere secondhand, usually chipped, usually cheap.
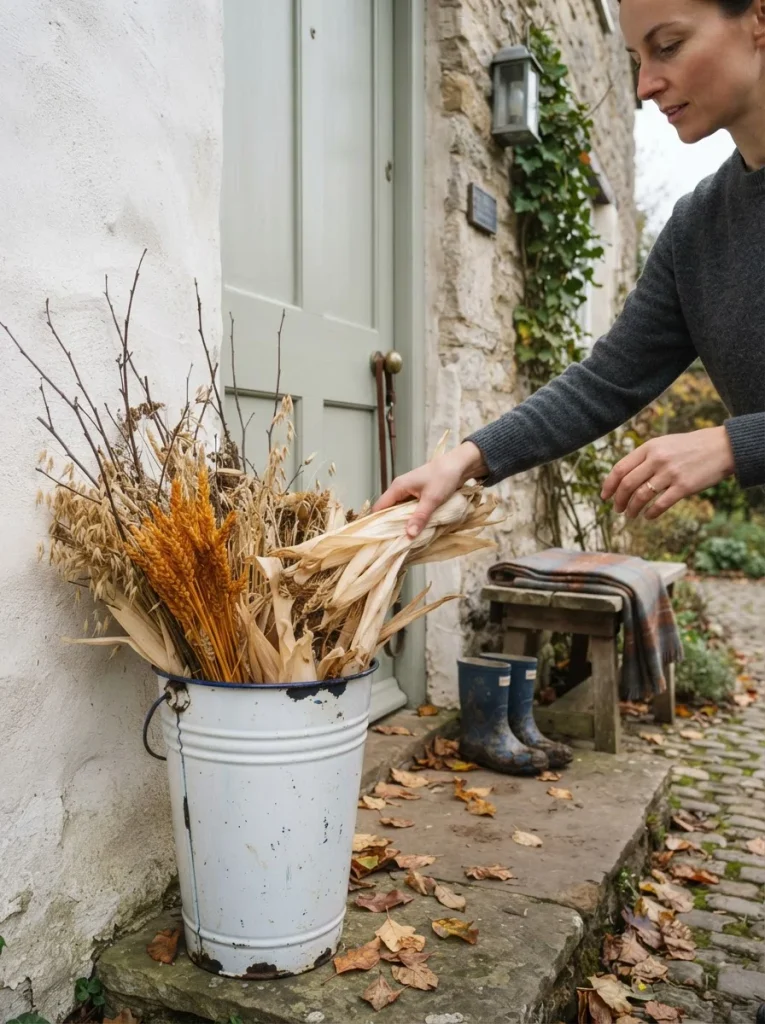
Fill it with dried corn husks, wheat, bare branches or dried hydrangea. Stand it beside the front door and leave it there until February.
The chipped white and blue enamel against dried brown plant material is the whole vintage autumn palette in 2 objects.
This one also solves the problem of a doorstep that looks empty. One tall thing next to the door does more than 5 small things spread across the step.
Put a stone or a brick in the bottom before you fill it, otherwise the first proper wind takes it over.
15. Hang a bundle of old keys on a ribbon
Find it.
Old keys sell for almost nothing in bins at flea markets, and they’re one of those objects that instantly say old house without saying Halloween.
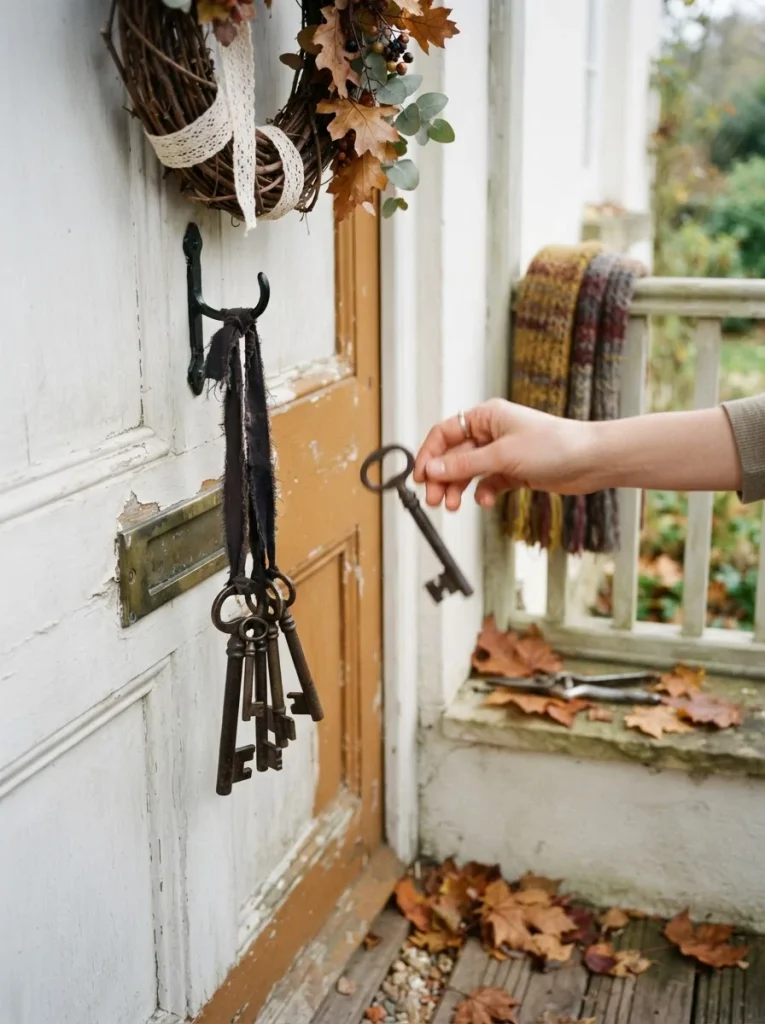
Tie 5 or 6 of them at different lengths onto a strip of dark ribbon or a leather cord, and hang the bundle on the front door under the wreath, or from a hook in the hall.
They knock together gently when the door opens, and that small sound is honestly the best part.
Mix the sizes. A few tiny ones and 1 big iron one looks far better than 6 similar keys.
Rub them with a dry cloth rather than cleaning them, the dull finish is what you want.
What Actually Works: Colors, Aging Paper and the Mistakes That Give It Away
This is the part I worked out by getting it wrong a few times, so you don’t have to.
The colors that hold this look together
| Black and cream. | The backbone of the whole thing, and the reason the paper garland and the framed silhouettes sit so well in the same room. |
| Amber, brown and bottle green. | This is the glass palette, and it’s what makes the light look warm without anything being orange. |
| Tarnished brass and dark wood. | The metals stay dull. Anything polished bright reads as new, which is the opposite of what we’re doing. |
| Dried plant brown and faded rust. | The dried flowers, the corn husks, the old book cloth. |
The pair to avoid is purple and lime green.
That combination is the signature of exactly the plastic aisle we’re trying to leave, and one purple object will drag everything else down with it.
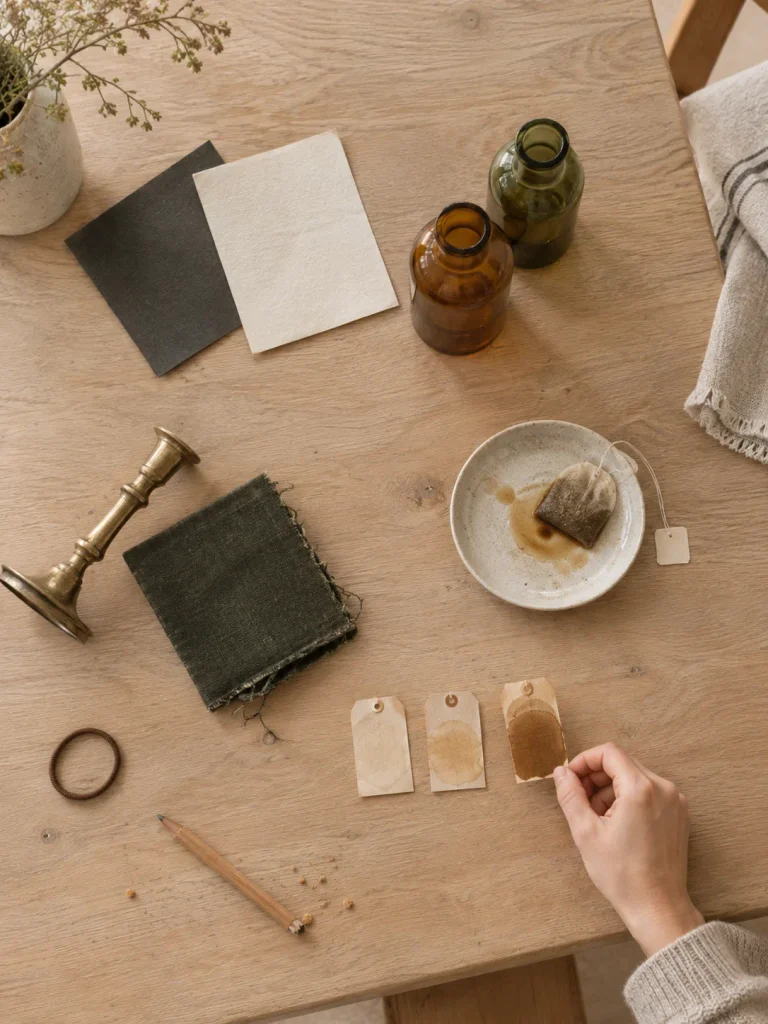
How to age paper without ruining it
One used teabag, a saucer with a bit of warm water, and 15 to 20 minutes. Take the paper out while it’s still fairly pale, because it keeps darkening as it dries.
Dry it flat on a radiator or between two tea towels under a book. Never dry it hanging, it curls into a tube and won’t come back.
Coffee works too and goes browner. Tea goes yellower, which is closer to genuinely old paper.
Test on one sheet before you do 20 of them, because different papers drink the tea at completely different speeds. Printer paper goes blotchy, book paper goes beautifully even.
The 4 mistakes that give vintage decor away
1.) Buying anything with a printed face on it.
A cartoon pumpkin face is the single fastest way to lose the effect you’ve spent an afternoon building.
2.) Cleaning the old things.
The tarnish, the chipped paint and the dull key finish are the reason the pieces work.
3.) Making everything match.
Real collections are built over years out of things that don’t match, and that mismatch is what your eye reads as age.
4.) Adding purple or lime green anywhere in the room.
I’m saying it twice because it’s the one I keep seeing in otherwise lovely houses.
Where to actually look for this stuff
Charity and thrift shops, in the housewares aisle rather than the seasonal one. Flea markets in the last hour, when sellers would rather sell than repack.
Your own attic, your parents’ attic, and the box your mother in law keeps meaning to sort out.
And online marketplaces, searching for the object rather than the holiday.
Search brass candlestick, not Halloween brass candlestick, and the price drops by half.
Why I’d Rather Have Old Things Than Scary Ones
Halloween is a new celebration here where I live. Not a traditional thing.
I grew up in a small village in eastern Hungary and nobody had heard of it, and even now, in our part of Budapest, most of the decorating is one carved pumpkin on the gatepost with a tealight inside.
So I came to the whole thing without any childhood picture of what it should look like. That turned out to be useful, because I never felt like I had to buy the skeleton.
What I do have is a real feeling about old objects, and that came from my grandmother’s house. Everything in it was old. She wasn’t decorating, she was just keeping things, and 40 years of keeping things is its own kind of style.
There’s actual research behind why this feels good, by the way.
Psychologists have studied nostalgia for 20 years, and the work on nostalgia as a resource found it reliably lifts mood and strengthens the sense of connection to other people.
A later study went further and linked it to a stronger feeling of authenticity, which is a slightly grand way of saying that old things make you feel more like yourself.
I felt that before I read it.
The tin lantern does more for me than any decoration I’ve ever bought.
And here’s the part I’d argue about with the internet: scary is the least interesting thing Halloween decor can be.
Scary lasts one evening. Strange, old and slightly funny lasts the whole autumn.
A stopped clock, a bottle labeled Rain Water and a lace curtain with a cat behind it. Nobody is frightened, everybody looks twice.
Related post: If you want the version of this that’s less about Halloween and more about the whole season, I wrote about that in Slow October.
Go and find the most worn looking books on your shelf, take 4 of them, tie the stack with string and put a candlestick on top. That’s 2 minutes and the hall table is done.
The Vintage Halloween Decor Checklist
Save this list somewhere you’ll find it on the first cold Saturday of October.
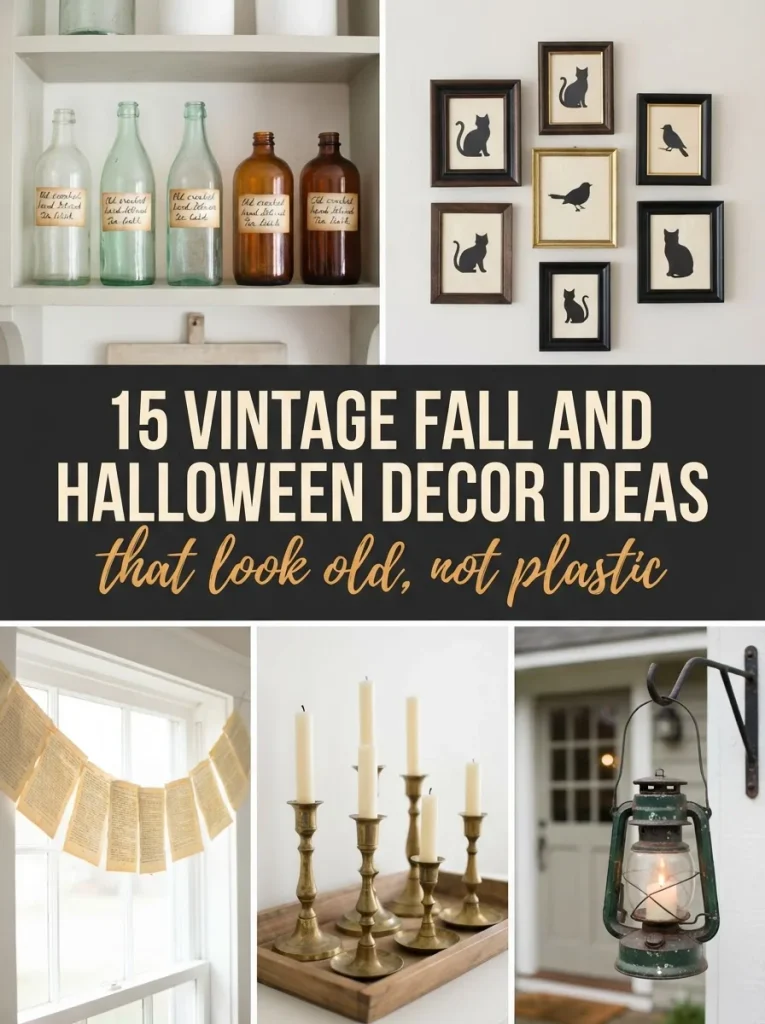
Save this pin for later on your Pinterest board!
Vintage Halloween Decor: Questions Readers Ask
What exactly counts as vintage halloween decor?
Vintage halloween decor is anything built from old or old looking materials, paper, glass, tin, wood and lace, rather than printed plastic. It usually borrows from the 1920s to the 1950s, when decorations were mostly die cut card and candlelight. Real antiques are lovely, but a tea stained label on a saved bottle gets you 90 percent of the look for nothing.
Where do you find vintage halloween decor cheaply?
The cheapest vintage halloween decor comes from the housewares aisle of a charity shop, not the seasonal one. Old candlesticks, doilies, frames, clocks and enamel buckets all sell for very little because nobody is competing for them in October. Search online marketplaces by the object rather than the holiday, and the same item usually costs about half.
Is vintage halloween decor safe around small children?
Vintage halloween decor is usually gentler on small children than the shop bought kind, because there are no jump scares and no gore in it. My own 6 year old walks past all of it without a second look. The 2 things to watch are real candle flames and old painted metal, so use LED candles and keep flaking painted pieces up high.
How do I make halloween decor look old without it looking dirty?
Old looking halloween decor comes from tarnish, worn paint and faded paper, never from actual dirt. Wipe every piece with a dry cloth so it’s clean to touch, then leave the finish alone. The rule is simple: the surface should be dull and worn, but the object should be something you’d happily hand to a guest.
What colors work for vintage halloween decor?
The colors for vintage halloween decor are black, cream, amber, bottle green, dull brass and dried plant brown. Warm candlelight ties them together. Purple and lime green are the pairing to skip, because they’re the signature of mass produced plastic decorations and a single purple object will make everything else in the room look cheaper.
Can I use these ideas for outdoor halloween decor too?
Yes, 6 of the 15 ideas work as outdoor halloween decor: the tin lantern, the glass bottle path lights, the hop wreath, the enamel bucket, the bundle of keys and the lace curtain window. The only rule outdoors is to bring glass and paper in when it rains, and to use LED candles anywhere the wind can reach the flame.
How long can vintage halloween decorations stay up?
Vintage halloween decorations can stay up from the start of October until well past Thanksgiving, which is their main advantage. Because nothing in this style shouts Halloween, the amber bottles, dried flowers, book stacks and brass candlesticks all keep working through November. Only the black paper shapes and the silhouettes come down at the start of the month.
What is the cheapest vintage halloween decor idea to start with?
The book page garland is the cheapest vintage halloween decor idea and costs nothing at all. A falling apart paperback, some cotton thread and an hour in front of a film gives you enough garland for a whole window. The bottle apothecary shelf comes second, since the bottles are free and a teabag ages the labels.
Do I need real antiques for this to work?
Real antiques are not needed for vintage halloween decor, and most of my own pieces are just old rather than valuable. A 4 dollar broken clock, a saved olive oil bottle and a doily from a charity shop bin do the job. What matters is the material and the wear, and neither of those things requires an antique dealer.
How do I store vintage halloween decor so it survives the year?
Store vintage halloween decor indoors in one lidded box, never in a garage or a shed where damp gets at the paper and the metal. Paper goes flat in an envelope standing upright, glass gets wrapped in the tea towels you were going to wash anyway, and the candlesticks go in a drawer. Label the box by month rather than by holiday.
Recommended Reading
14 Simple Halloween Decor Ideas You Can Reuse for Years
Fall Decorations 2026: 24 Pieces You’ll Still Love Ten Autumns From Now
Why I Stopped Buying New Patio Decor
How to Stop Wanting New Things and Start Living a Simple Life
What a Hungarian Flea Market Taught Me
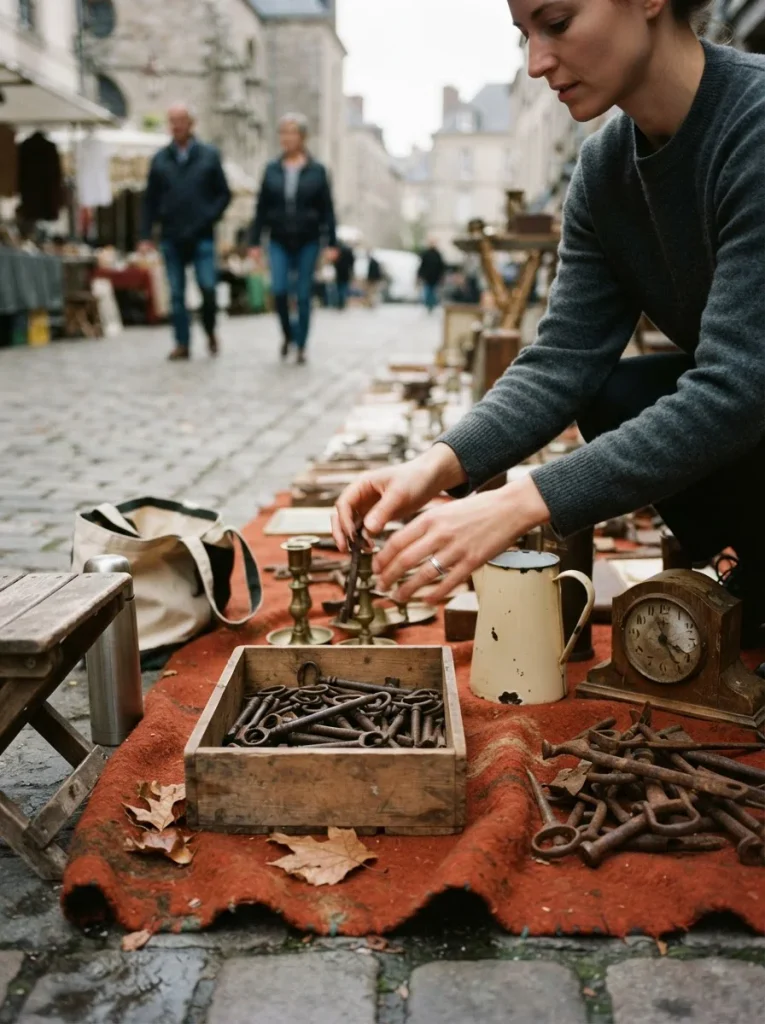
There’s a market near us on Sunday mornings where an old man sells tools, keys and things nobody can identify, spread out on a blanket on the ground.
I bought 6 keys from him for the price of a coffee. He watched me pick through the box and asked what I wanted them for, and when I said decoration he laughed at me in the friendliest possible way.
They’re hanging on our front door now, and they knock together every time somebody comes in.
I still don’t know what any of them opened, and I’ve decided I like not knowing. Which of these 15 ideas would you actually try in your house this October?
Recommended Posts
-
Sweater Outfits: 11 Fresh Ways to Wear One Burgundy Sweater All Winter
In this post I’ll show you how to wear one burgundy sweater 11 different ways, from a Monday at the office to Christmas Eve dinner. You’ll also find color pairs, the mistakes that make a knit look tired, and simple care tips that keep it soft for years.
-
Christmas Savings Challenge: A Printable Tracker for Weekly and Biweekly Paydays
This christmas savings challenge turns the cost of December into small, planned amounts you set aside from now until the holidays. You’ll find 8 simple challenges with the real math for weekly and biweekly paydays, plus a free printable tracker to color in.
-
Christmas Mantle Ideas: 13 Calm Looks With Zero Clutter
These christmas mantle ideas help you build an elegant fireplace display that looks calm instead of crowded. You’ll find 13 looks, from a lush garland with burgundy velvet to a mantel with a TV above it, plus color pairs and the mistakes worth skipping.